Expansion Evolution

The Former Dawn project is largely about pushing the limits of game development on the NES, and thus far I’ve focused on the video aspects. But I’d be remiss if I didn’t explain how our audio components of MXM-1 (and therefore Former Dawn) came to be.

Click here to skip to the TL;DR. What follows is the detailed account.

Prehistory

The much vaunted, most advanced memory mapper before ours. Its expansion audio left much to be desired.

We spent most of 2019 getting our feet wet with the NES’s hardware and 6502 assembly. At the time, despite the fact that I already wanted a new and advanced memory mapper, we did not have one. So for a while we vacillated between MMC3 and MMC5 as our best option from the established ones. As some of you may know, MMC5 was used in many North American NES localizations of Famicom (read: Japanese) games — most notably Castlevania III. Unsurprisingly, it actually has expansion audio capabilities that saw commercial use in Japan but not elsewhere. In particular it offers two additional square wave channels and one extra PCM channel. (Its PCM channel has to be spoon-fed by the CPU, which is death to a high performance game engine.) The first NES cartridge manufacturer that we reached out to told us that they could produce MMC3 based cartridges easily, but that MMC5 was more questionable. Therefore we thought we were limited to MMC3, which meant no expansion audio at all and (by our judgment) extremely limited ROM space. So we never really entertained the possibility of using MMC5’s infamously bad 8-bit PCM feature, which is a good thing. But even with MMC3, I was willing to dedicate a larger amount of the ROM to DPCM samples than was typically done in NES game dev in the original commercial era.
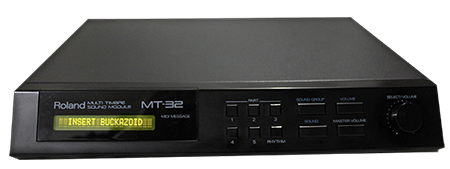
As amazing as this is, it would’ve been overkill and far too expensive to put into an NES expansion system around the year 1990. Even most PC owners couldn’t afford it at the time.

Around the same time, we were figuring out ways we could innovate in software alone, and that included an attempt by Dominic to simulate Roland’s LA synth (“Linear Arithmetic Synthesis”) technology that debuted in their D-50 keyboard but later became the basis for the MT-32 and related MIDI modules. See here for an excellent explanation and showcase.

He created a proof-of-concept demo ROM and it was intriguing to say the least, but it wasn’t long before we teamed up with INL and it became clear that we were going to be able to craft our own memory mapper for the NES after all. But expansion audio still wasn’t something we wanted to deal with because of how daunting the task seemed and our relative lack of experience in it.

Around this time, I contacted a veteran demo coder I had met on the aforementioned VOGONS forum; specifically, I asked him what he thought about the possibility of implementing a MOD player on the NES. It’s no secret that despite my love for the NES, my greatest influences in the audio department come from two principle sources: the SNES, and the MOD tracker community which was largely associated with the demoscene of the late 80s and early 90s. He replied and told me that something like a MOD player had been implemented on the NES using native PCM, but it (like MMC5’s PCM channel) took so much CPU time that it wasn’t really possible to create a good game that uses it. It’s for demo purposes only. Therefore, he gave me referrals for two well seasoned chiptuners who know how to wrangle the native 2A03 channels of the NES.

I reached out to both of them and they both ended up involved in the project in some capacity; more on that later.

QuadDPCM Era

Up to this point in the project I had been far stricter in my philosophy concerning what was legitimate to put into our memory mapper and what wasn’t. I wanted to absolutely minimize anything that could be regarded as “computation” in the cartridge, and expansion audio seemed like the closest thing on the NES to that; a vaguely related precursor to the general purpose processors that were used as video coprocessors in SNES cartridges in the mid 90s. Because of that, there didn’t seem to be much of anything we could do to improve the audio directly. (Or video, for that matter.)

Runtime Mixing Period

A graphical representation of the L² quadDPCM LUT. This won’t help you understand the math, but it looks cool.

Then one day, Dominic had the idea of doing what had never been done on the NES before: virtual DPCM channels that are mixed in software. It was a very clever approach: the basic idea is to construct a lookup table (“LUT”) that takes in two bytes as input and produces a single byte of output. The inputs are bit-packed bytes of DPCM sample data, and the output is as well. By precomputing this LUT and storing it in the ROM, we could mix two channels at a time. The number of channels that can be mixed this way is theoretically unbounded, but in practice the noise floor becomes so bad after 3 mixings that quad channel was about what we could hope for in a sound track that we were willing to put in our game. [Math jargon: Dominic used what I recognized as a distance minimization algorithm which embeds the vector space F28 (representing DPCM) in R8 (representing PCM) and uses the induced metric from the L1 norm on the vector space R8. I suggested using the L² norm instead, which did alter the LUT but we’ve never been sure if it really improved the quality of the results.] The ROM footprint for the LUT was 32KiB, which is the same size as the entire PRG-ROM for Super Mario Bros.. Most developers in the NESdev community would consider this an excessive expenditure, but by this point we were already beginning to develop our own memory mapper and it was very clear to us that 32KiB was not only something we could accommodate, but a price well worth paying.

Technique in hand, I had Dominic download and modify the C++ source code for FamiTracker to support this pseudo-expansion audio system. He was quite successful despite the difficulty of working with that codebase, and we now had an internal tool for multichip compositions using the native 2A03 (non-DMC) audio channels alongside what we called, by then, quadDPCM. A big part of the reason why we considered quadDPCM viable is that we were willing to have all audio samples for it to use the NES’s maximum sample frequency of 33,144Hz. This was done in the classical NES era(famously the bit-reversed Double Dribble intro voice sample), but never universally employed within a game. Samples back then were always judged in terms of their quality at different playback rates and then the lowest acceptable rate chosen in order to reduce ROM footprint. Since we could afford it, we went for the max. But one of the consequences of doing this runtime based mixing was that individual virtual DPCM channels could not have “virtual playback frequencies”; they were all locked to the same one. This implied that every pitch-shifted version of a DPCM sample had to be created at build time and baked into the ROM so that the music engine could call upon whatever it needed on demand, never varying the overall playback frequency of 33,144Hz.

These were a few of the very first experiments that composers on our team came up with using gen1 quadDPCM:

“Inversion Battle”
“Coping ATM”
“Walk With Me”
“Bass1”

Build Time Mixing Period

One of the those two composers took our quadDPCM-enhanced FamiTracker and created several excellent demo pieces with it. This generated a lot of excitement for the project and helped propel us further into the engineering effort. Although the noise floor was raised by the virtual DPCM channel mixing, it wasn’t unacceptably bad…but I did find a way to improve it. Specifically, I came up with the idea of giving FamiTracker full PCM instead of DPCM for the instruments, then taking the track data generated by FamiTracker and using it to identify the sections of PCM that would become individual DPCM streams; they were then mixed together ahead of time as PCM, crunched down to DPCM, and stored in the ROM for playback on the NES. This had the effect of lowering the noise floor significantly but at the expense of more ROM space, which we could by that point afford. (The entire OST was slated to use no more than ~30MiB of DPCM data, which is well within what we can support on the cartridge.) I also implemented mapper code in Verilog to support DPCM samples up to 16MiB in length.

I then had Dominic modify FamiTracker again in order to support the new approach, but this time I chose Dn-FamiTracker because it is being actively maintained and is more popular than other versions.

Here a few demo tracks exhibiting the improvement in clarity over the runtime mixing version:

“Holy Crap Dn”
“Hella Beats”
Synth2 2G Demo
“Come Into My Garden”

In parallel to all this, I was reconsidering just how strict I should be in my mapper philosophy; I ended up concluding that helping enhance the video directly instead of indirectly was acceptable, as long as A) the circuit complexity was kept low enough to be economically viable in 1990 B) graphics were not generated on the cartridge but merely made available to the PPU based solely on what was stored in the CHR-ROM(or CHR-RAM, if we could manage to manipulate or create it there). Because of this relaxation of the engineering boundaries, I began to consider bona fide expansion audio after all.

Sometime in the near future, we may release the both our modified FamiTracker and the technical details of this for those who wish to employ it in homebrew NES games to achieve better music without expansion audio. For now, here’s an example of what we were able to produce with it:

FM Synth Era

Yamaha YM2610 Period

So I approached the senior composer on the project and asked him what kind of expansion audio on the NES he would want if he were given carte blanche. He immediately suggested that we abandon all of this and use the Yamaha YM2610 audio chip which was used in the Neo·Geo MVS arcade machines (and their home console equivalent called the AES). The YM2610 sports an insane amount of fancy tech, especially for the early 90s when it debuted. It essentially has the FM core from the Sega Genesis and the PSG from the MSX & Apple // with 7 channels of ADPCM bolted on. This seemed like overkill to me, but I wanted him to have whatever he needed to make the OST for Former Dawn really shine. It also passed the period-correctness test, since the YM2610 was in consumer electronics by 1990(technically by 1987 if you count arcade machines).

The Yamaha YM2610. Paul from INL once referred to these as “beast mode”, and he’s not wrong.

I proceeded to order a 50X batch of real, physical YM2610 chips from a parts supplier in China. I presume they were pulled from old MVS arcade boards. We began an investigation into the hardware engineering side of this sub-project; this time around, it would not be a mere re-flashing of an FPGA or beefier chip that’s pin-compatible with the existing PCB. This would mean either a daughter board attached to the main board, or a complete re-design of the main board. Our cartridge manufacturer was not going to do the latter, so we tentatively settled on the former. However, I knew that that part of the engineering could wait because it was really only necessary for the production of the final game’s cartridges. For our dev environment, we could and should only consider what can be done in the FPGA with additional Verilog code. (And in fact, at this point I was considering having 2 if not 3 editions of the Former Dawn cartridge, based on whether or not the FPGA was handling the expansion audio or if a genuine YM2610 was present in the cartridge, and whether or not to use the EPSM for the FM part.)

As luck would have it, I was able to get special licensing for a pre-existing Verilog implementation of the YM2610; “all” that we had to do was adapt it to the Cyclone IV FPGA inside the EverDrive N8 Pro and then integrate that with the rest of our mapper design and game engine. The first part of that was a wild success; Josué was able to get it running beautifully on the EverDrive N8 Pro and for the first time, we heard genuinely amazing music pouring from our frontloader NESes. The second part was a bit of a chicken-and-egg problem, since we didn’t have a music playback engine created yet for Former Dawn or a convenient way to create tracks for the engine that would have to be created. For a while, I investigated the various possible solutions:

  • Since the FM core of the YM2610 is very close to that of the YMF288(/YM2608), use FamiTracker for the 2A03 part of the soundtrack and BambooTracker for the FM part. Whether the FM would play from an EPSM, our FPGA, or a real YM2610 was a hardware choice that would have software implications. Since the YMF288 doesn’t have ADPCM channels, they could be hardware-emulated in our FPGA on an FPGA-only cartridge, or they could play directly from the YM2610 for the edition of our cartridge with a genuine Yamaha chip inside. This would’ve required synchronization between the two trackers for the composer to have a ghost of a chance of getting into a flow state, so I proposed hacking in IPC features into FamiTracker and/or BambooTracker.
  • Modify BambooTracker to include multi-chip functionality so that the 2A03 channels could be tracked directly, getting rid of the IPC problem. After speaking to the lead maintainer of BambooTracker, it became clear that this was not a very viable option because of the messiness of that codebase.
  • Hack FamiTracker yet again to add support for the YM2610. We’d already encountered pushback on this topic from people who maintain FamiTracker because they regard what we’re doing as “fantasy mapper” territory; a bare minimum requirement for them is that a commercial NES game already exists that uses this multi-chip configuration; yet another chicken-and-egg problem. So this would be a pretty substantial source code modification done by us or someone we commissioned to do the work. Didn’t go very far down this road before rejecting it. (Especially because it would’ve resulted in yet another unmaintained public fork of FamiTracker.)

And then, a miracle happened: FurnaceTracker came out. Word travels fast in the retro space, so I was abreast of its existence very quickly and was delighted to discover that it natively supported everything we’d need; our tracker problem was solved as long as our composer was willing to work with this new tool. He was! So now we moved on to what our game engine and hardware would need to look like.

“Hell Hath No Women”
“Town_2 Theme (YM2610)”
“Square Boi” (YM2610 PSG experiment)

I’ve been adamant about the fact that I do not want a general purpose coprocessor on the Former Dawn cartridge, at least not in such a way that our design requires it. (I.e. although I’ll grumble about it, I’ll accept something like INL using an STM32 chip to communicate with an SD card reader because it eases implementation, but not if that chip is available to the NES’s CPU for general assistance.) The question “How are we going to feed this thing?” had been hanging over our heads for a while on this project; “this thing” here means the YM2610. It is a very complex chip, and feeding the data it needs was going to be a serious problem to overcome. We knew that in the case of the Sega Genesis and the Neo·Geo, a Z80 CPU was included on the motherboard and used as a coprocessor to handle the I/O involved in music and sound effects playback. As it turns out, even the SNES has something similar going on although it doesn’t seem to be as widely recognized as such. The audio subsystem of the SNES has two principle chips: the S-DSP and the SPC700. (People seem to misattribute things that the S-DSP is doing to the SPC700 in the retro community, a bit like confusing “HDMA” with “Mode 7”.) But the SPC700 is essentially yet another processor with a 6502 core whose function has been dedicated to audio I/O handling; the S-DSP actually renders the sound.

Without a coprocessor, the only way that Josué had been able to feed it the register data that it needed was to simply stream the instructions in; he had only considered the bandwidth restrictions we have in place, not the way that we are forced to conform to them because of LARPing. Yes, it is true that in the MS-DOS era, CD-ROM based games would often come in a hybrid format where part of the disc was filesystem data and the rest was redbook audio ─ but this way of listening to the soundtrack was only viable on those games because the games (almost) always installed the bulk of the assets to the hard drive and there was enough RAM on the system to load the entire level/area. This freed up the CD-ROM drive to play music; we have no such luxury with Former Dawn. It’s bad enough that I’m designing this game around the idea of what is essentially an alternate timeline in which the upgrade to the NES was done as a bolt on instead of a separate console, but it’s beyond the pale to imagine a hard drive and/or several megabytes of extra RAM being included with it. These were the very reasons that so many computers had been so expensive compared to home video game consoles, all the way up until the original Xbox’s debut in 2001.

After it became apparent that that solution was untenable, there remained only 1 possibility: feeding the YM2610’s registers directly from the NES’s CPU. Although this would make the amount of data and the bandwidth manageable and period-plausible, it didn’t take long to prove that this was completely untenable because of how much CPU time it would take every frame. So at long last, the YM2610 period was over. Coincidentally, the guy who was slated to be our main composer quit the project around this same time, so we were free again to consider other options without upsetting anyone involved.

Other Yamaha FM Synth Chip Period
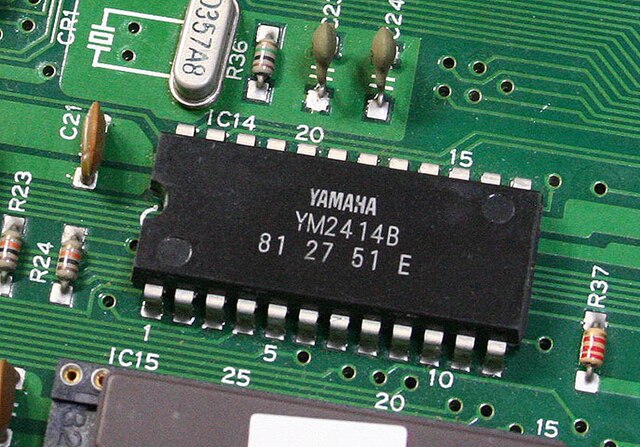
The Yamaha YM2414 FM synth chip. As you can see, it is not as beastly as the YM2610.

For a while, I wasn’t quite ready to abandon the FM synth idea for the expansion audio, so I had one of the other potential composers on the project take on the role of helping me figure out what off-the-shelf solutions might be acceptable. This was partly done by having him take a song he’d already composed purely for the 2A03 and enhance it with FM channels but not any kind of PCM. The following line-up of FM competitors (all from Yamaha) was considered: YM2414, YMF288, YMF262/YMF289, YM3812, and DX7.

“Town_2 Theme (YM2414)”

Within this same period, I also asked to hear proofs-of-concept for the PAULA chip from the Amiga A500(which MOD is based on) and the SID chip from the Commodore 64. (I looked sideways at the Namco N163 wavetable synth and a few other things, but never bothered to have a PoC delivered based on them.)

“Town_2 Theme” (Amiga PAULA/MOD experiment)
“Beep Boop” (Commodore 64 / SID experiment)

None of the FM options struck my fancy, and I finally realized why. They just sound out of place on a Nintendo console. Although I strongly associate FM synth with video games from the 80s and 90s, none of the systems they were used in, arcade or home console, were made by Nintendo. Here’s the list of systems I definitely remember FM synth being used in during those decades:

  • Sega Master System
  • Sega Genesis/Megadrive
  • Neo·Geo
  • Adlib and Sound Blaster cards for MS-DOS and Windows games
  • Miscellaneous arcade systems

In contrast, here’s the list of home consoles created by Nintendo that were contemporaneous with the above:

  • NES/Famicom
  • SNES/Super Famicom
  • Nintendo 64
  • GameCube

Not one of these sports an FM synth chip. Some people have pointed out that the SNES’s audio system can support FM synthesis, technically…but it is an extreme technicality, and misses the point. The sound of that system is nothing like the sound of a Sega Genesis, and it’s because it lacks the kind of FM synthesis that was, for better or worse, almost entirely engineered by Yamaha. There are cases of FM instruments being sampled and used as the basis for instruments in SNES games, but the general sound of SNES games is fundamentally different. The only example that I am aware of that is any kind of counterexample is the game Lagrange Point for the Famicom. It did indeed use the Konami VRC7 chip which included a stripped down Yamaha OPLL core. But it is the only known game, of any kind, playable on a Nintendo console that has FM synth. It was also something in the cartridge, not the console.

So I concluded that it was against the soul of a Nintendo game to use FM synth at all, and thus I returned to my original vision: something like MOD, but customized for the NES context.

Custom ADPCM Era

A high level overview of ADPCM compression; it does not really show the difference between plain DPCM and Adaptive DPCM.

If you’re going to make a MOD player for a primitive console, one of the biggest problems is the tension between ROM space and audio quality. If you set your bit-depth too low, you get an unacceptable noise floor. If you set it too high, you blow out your available memory. ADPCM is a clever compromise, and one that has historical precedent on various arcade and home console systems. Nintendo used a form of it called BRR for compressed audio samples that can fit inside the paltry 64KiB of RAM available to the SPC700 / S-DSP combo. They used another form of it in the Nintendo 64 and yet another form of it in the GameCube. So now we were getting somewhere authentic. Pushing it back 1 generation into the NES makes a certain kind of sense, especially because it is used in the TurboGrafx-16 which is what MXM-1 on the NES is inspired by in the first place.

But I wanted this to remain an 8-bit system; BRR uses 16-bit ADPCM, so I considered it inappropriate. What might 8-bit ADPCM sound like? It seemed like there were some pre-existing 8-bit ADPCM “standards” out there, but technical specs were not forthcoming. Dominic and I embarked on a brief journey of original research into a bespoke ADPCM compression system that our mapper could handle and would still meet my quality requirements.

I came up with two broad forms of it: 1) “flattened” ADPCM with the bit-depth specified for the entire sample (either 1-bit, 2-bit, or 4-bit step sizes) and 2) “multi-adaptive” (hence “MADPCM”) that not only allowed individual headered chunks in the audio stream to specify the step size’s bit-depth for just that one chunk, but for the number of chunks to hold that configuration. Both approaches had merit, and sometimes the quality drop from true PCM was barely noticeable. I created my own ADPCM compressor tool in Java to experiment with these approaches and we even tweeted our results (one time) when we were confident that we had something that was workable. But in the end, the quality was too hard to nail down in a general way. I didn’t want my composers to have to struggle with every single sample to get the quality to an acceptable level. We only achieved a compression ratio of about 1.4X over raw PCM when the quality wasn’t unacceptably compromised.

But I did notice that the compression afforded by this custom ADPCM was tantalizing for a specific purpose within Former Dawn ─ audio to accompany FMV. Every little bit of data compression counts in that case. The video will probably have to be compressed with something like LZ77, which means that the decompression simply can’t happen on the NES’s CPU. So the video compression will have to be implemented in MXM-1, freeing up the NES’s CPU almost entirely for audio decompression. It is also the case that LZ77 compression, despite working fairly well with the CHR graphics format of the NES, does not work well with audio samples. A back-of-the-envelope calculation revealed that ADPCM decompression could be done on the NES’s CPU, just barely, and meet my quality standard for FMV. All of this combined with the fact that audio is often a little scratchy in FMV of the late 80s / early 90s made me decide to relegate ADPCM for this purpose. So we moved on to raw PCM as the basis for MXM-1 expansion audio to be used in-game outside of FMV.

“Pluck (MADPCM_max4bit”

Try to ignore the pops and clicks in this last example(they’re merely bugs in some old code, but I don’t have a bug-free version). This is the Kzer-Za theme from my favorite video game: Star Control II: The Ur-Quan Masters, re-rendered using MADPCM samples instead of straight PCM:

“Kzer-Za Theme (MADPCM)”

QuadPCM Era

With all of that history behind us, it was time to re-examine raw 8-bit PCM for plausibility. This seemed like the best way to achieve my dream of enhancing the native 2A03 audio with something like a MOD player bolt-on ─ a kind of simultaneous homage to the NES, MOD, S3M, and the SNES. There were six main questions that emerged:

Q1 – Could we afford the space needed for PCM?

Q2 – Should the samples be stored in ROM or RAM?

Q3 – What kind of interpolation should we use? (Using FFTs seemed right out, so variable pitching with interpolation seemed the only way.)

Q4 – How many channels of this stuff could we afford, given our LARPing constraints?

Q5 – What should the cap on sample frequency be?

Related to Q5 was

Q6 – Could we support toploader NESes?

…and there was one side question, given the SNES influence:

Q7 – Would an echo buffer like on the SNES be possible within our 8-bit constraints? Would it sound good enough to justify?

To investigate the first question, I looked more closely at the MOD standard and ensured that the samples used were 8-bit mono PCM (they are) and that there’s no data compression employed (there isn’t). Given that many amazing MOD files exist that are measured in a few dozen KiB, I concluded that we could store all of the samples for a decent OST in ROM, use no RAM, and move on with life. Dedicating 1MiB to the sound font for Former Dawn’s soundtrack is well within my philosophy. That much space should afford us, conservatively, somewhere around 50 to 200 audio samples to use as the basis for instruments in the soundtrack. Since the SNES’s audio system is the closest pre-existing one to what we’re engineering, I looked at the sample suite employed in a few of my favorite SNES games and concluded that we were in the right ballpark.

But whether or not there should be a global sound font stored entirely in ROM, or a partially global sound font which is stored mostly in ROM but partly in CD-ROM and loaded per-track into RAM…that remains an open question. We will be OK either way, so which way we end up will emerge as a consequence of the soundtrack being developed over the course of the rest of the project and the memory model evolving to fit the game’s design and implementation.

The correct filtering kernel to use. Essentially, the engineers at Sony who created the audio subsystem for the SNES made the “mistake” of only using the middle lobe, which strips all of the harmonics that you get from the small lobes emanating off to the sides.

The interpolation question was far more interesting. Dominic and I had recently watched an excellent video explaining (among other things) how the SNES re-pitches samples at runtime. The gist is that it uses what is called a “gaussian filter”, which, although enjoying some nice mathematical properties, results in the extremely muffled sound that is characteristic of the SNES. We can only speculate, but it seems like they chose what is essentially a fancy low-pass filter because they wanted to be able to get away with BRR compression without noticeable high frequency artifacts in the output. I wanted to investigate the right way to do it; to learn from the SNES’s mistakes. So we delved into sinc function interpolation, again with some experimental tooling written in Java. I decided that dedicating 1KiB of ROM space would be reasonable and set the effective LUT size to 2048 entries, taking advantage of symmetry. Unlike in the SNES’s case, though, my LUT has 8-bit signed values instead of 11-bit unsigned values. In some sense it’s really only 7½ bit because we can’t easily take full advantage of that last ½ bit of numerical range without greatly complicating our hardware design as synthesized on the FPGA. Intuitively, I set the number of lobes of the sinc function that should be included to 7; the results were absolutely amazing, except that we had a “ringing” problem that was audible to the human ear and easily detectable with the frequency analyzer built into Audacity. So Dominic slapped a Hann window on the LUT, the ringing went away, and we had our filter.

There were 5 concerns that underpinned my decision to go with 8 channels of PCM:

  1. Could the NES drive that many channels without coprocessing?
  2. Could the kind of RAM that was economically available in 1990 (100ns DRAM) service enough reads to make the sinc function interpolation and re-pitching possible without data corruption, stability problems, etc.?
  3. Would we be able to create a mixer and output stage in the mapper that would actually sound good with that many channels?
  4. I wanted the 2A03 synth channels to meaningfully participate in the soundtrack, but never have the sound effects cut out the music or vice versa. Would 8 suffice?
  5. Was going to 8 channel PCM on the cartridge going to make the circuit complexity exceed what was plausible in 1990? Would our dev cartridge be able to handle it? Would our production cartridge?

As it turns out, the fact that we accept the NES’s CPU as the main performance bottleneck was a boon in this case. If an audio system is based on PCM sample playback and the samples are “long” (typically lasting dozens of NTSC frames), it means that the CPU doesn’t have to update any particular PCM channel very often, freeing it up for video and game state related tasks. Contrast this with the case of PSG or FM synthesis, which often have updates going to the channel registers every single frame, especially in order to achieve richer timbres. The only aspect of a PCM channel that has to be updated routinely in the middle of playback is a loopback instruction, but we decided to facilitate that with a header that the mapper can store in its own memory space. Effectively, the end result is a fairly efficient, simple, high performance wavetable synth.

On the RAM performance question, the relevant factors are maximum playback frequency, size of each data fetch, and granularity of the convolution with the filtering kernel. If this system had been created in 1990, the LUT would’ve probably been internal to the ASIC of the wavetable synth chip, and it’s very clear that access speeds would be no problem with that kind of implementation. The samples, too, might’ve been stored on separate ROM chips on a cartridge or even included in the expansion system — imposing a truly “global” sound font across many games. There have been wavetable synths released into the consumer electronics market that employ this kind of design. For us specifically, the LARPing constraints aren’t really the relevant ones — we have to deal with the realities of our dev cartridges and the eventual conversion to the production ones. With 1 byte per fetch, 7 LUT fetches per re-pitched sample, and a small ring buffer for the fetches…we were able to get it working perfectly on the EverDrive N8 Pro which is what we use as our dev cartridge.

Having a 16-bit resistor ladder DAC on the production cartridge would be nice, but it’s hard to justify because it would complicate the hardware design and we have a high enough frequency oscillator (100MHz) that a PWM DAC can be easily constructed. Similarly, on the EverDrive N8 Pro, the DAC that krikzz supplies with the out-of-the-box mapper support (SUNSOFT 5b, VRC6, etc.) is a PWM DAC, and we have followed suit with our own. (Technically, like krikzz, we have implemented a variation on the PWM DAC called a Delta-sigma DAC.) What feeds the DAC is the mixer output, and there are eight channels of 8-bit audio. This results in a theoretical lossless bit-depth of 14-bit, not 16-bit. But in practice, the lower 3 bits can be dropped entirely without audible quality loss. The only scenario in which that 14-bit level is reached is when the output is at max volume, which means that a human can’t hear the least significant bits. (Imagine trying to hear a mouse squeak when you’re standing next to a jet engine.) So our mixer & DAC combination consumes 64 bits of digital input and produces 11 bits of analog output to the NES’s audio out line. (Much thanks to Zeta for hammering out the fine technical details when he implemented the mixer in Verilog!) We think that the resulting quality is excellent — probably the best 8-bit sampled audio system ever created, and we hope you agree.

Speaking of 8-bit audio, it is very important to me that all of this constitutes an expansion system. I never wanted a whole-hog replacement of the NES’s audio. Therefore, I require that the composers on the project do their best to fully utilize the non-DMC audio synth channels present in the 2A03 alongside the PCM channels. The two systems should complement each other, not vie for centrality. At the same time, I want the sound effects of Former Dawn to be rich and distinctive, so I wanted to use the PCM channels for SFX and dedicate the 2A03 synth channels to the overall polyphony and texture of the music. Having eight total PCM channels allows us to dedicate four of them to SFX and four of them to music, and never the twain shall meet. On the SFX side, I reserve one PCM channel to an “ambient” or “mood” channel for each area of the game ─ something like wind blowing or water flowing. That leaves three PCM channels open for business: attacks, footsteps, special abilities, UI sounds, etc. It should be plenty for the kind of game I’m trying to create.

The circuit complexity question is one that is constantly on our minds, and we think we’ve done a great job of keeping it under control. Our system is very simplified compared to a lot of systems in the late 80s / early 90s (see: YM2610) but it also offers a lot of expressive power. The balance struck seems to be the right one for this project. Also, we do consider the circuit complexity of MXM-1’s audio subsystem separately from the memory mapping per se, so even though we have now exceeded MMC5’s circuit complexity, it’s in a way that does not violate our principles. Although it could’ve been put on individual cartridges, this part of the system seems more appropriate to embed into an expansion module that would fit underneath the frontloader NES along with the CD-ROM drive. What would’ve been on the cartridges for such a system would’ve been the fast-access ROM needed for the game’s program code, and probably the core of game’s graphics that need to be globally accessible on demand. In reality, we have something that fits well within the constraints of the EverDrive N8 Pro and our production boards, so the project’s music and SFX development is now full steam ahead!

Going back to Q5: the answer is 44.1KHz. This is the standard that was established by redbook audio used on CDs, and we’ve decided to adopt it for similar reasons that they did. Because of the Nyquist theorem and the normal range of human hearing, it’s more than enough and also matches the highest quality audio samples that we will take off the shelf or record ourselves. It also makes it possible to turn the NES into a CD player in a weird sense; CD quality sample rate with 8-bit samples, and also mono. It does seem like the kind of thing that Nintendo might’ve done if they had gone this route in 1990; i.e. upgrading the NES instead of replacing it completely. In reality, we rarely if ever use a source sample that has that high of a sampling frequency, but having a cap that high allows us to re-pitch samples up and down, achieving a sort of “meta compression” in our sound font. A single sample can be used to span many octaves and still sound good, which is a rare feat on these kinds of audio systems.

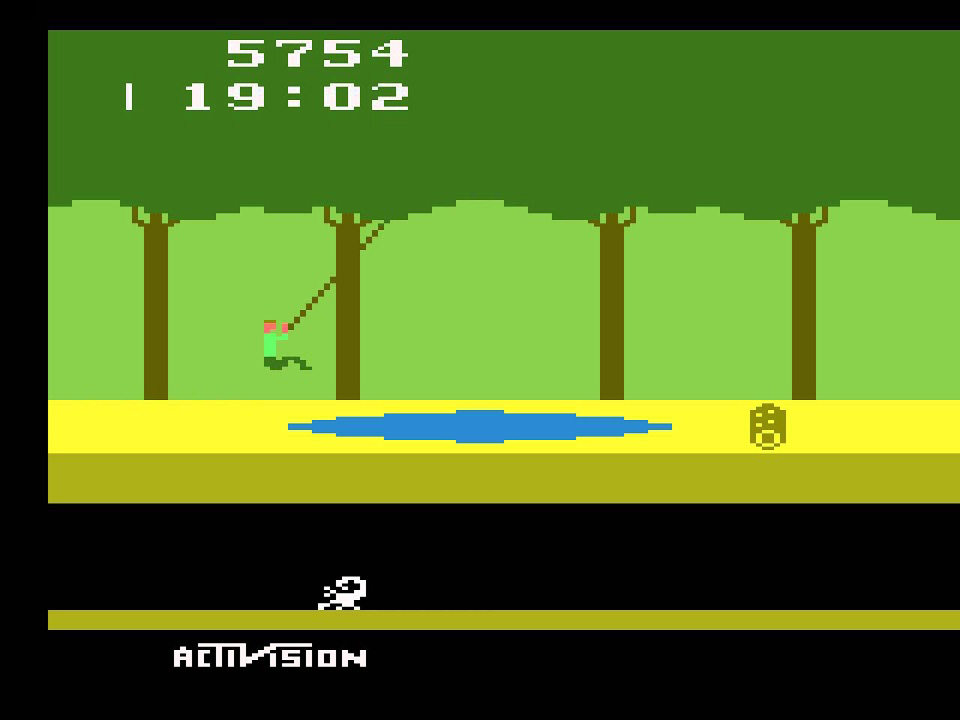
In the early stages of developing this audio expansion system, we investigated the possibility of supporting the toploader NES(model NES-101) as well as the frontloader and Famicom. Because the toploader was an economy model, it lacked that mysterious expansion port on the bottom of the unit. In order to get any enhanced audio out of that system, therefore, we would have to manually update the $4011 DMC register hundreds of times per frame during normal gameplay. Although there are ways to achieve this (see David Crane’s brilliant historical example on the Atari 2600), it would definitely impose a very high development cost on us as well as an unacceptable performance hit if we were to do it the full 734 times per frame required to achieve the max playback frequency of 44.1KHz. The NES’s available CPU cycles are its most limited resource, and we’re simply unwilling to take that high of a performance hit because of the needed richness in the gameplay.
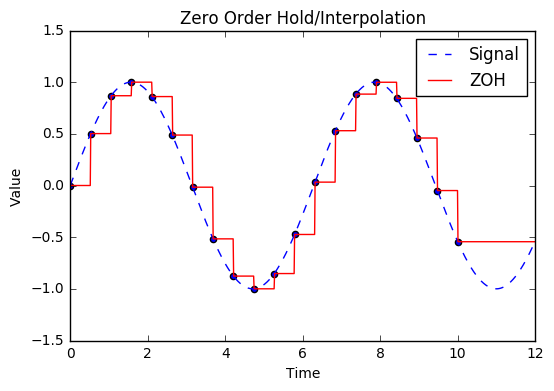
This is the type of “interpolation” that one gets when pushing PCM audio out of a toploader NES; it is sometimes referred to as “zero order hold”, and it results in terrible audio quality.

As a possible compromise, we considered making it an option for toploader owners to drop the audio’s playback frequency to 50% or even 25% and thereby recover the CPU cycles needed for smooth gameplay. Thus we went ahead and did testing on a toploader using the techniques that would be required and discovered to our dismay that there is an unacceptable, unavoidable non-white-noise increase on top of the mere reduction in clarity. This is because of the way that manually updating the $4011 register results in a waveform change on the system. Once the DMC’s output is manually set to a specific level in its 7-bit range, the 2A03 holds the value there instead of letting it naturally fluctuate. This amounts to one of the worst kinds of interpolation one ever encounters in practice ─ a kind of weird ringing tinge to everything that’s hard to tune out. White noise is one thing; intermodulation is something far less pleasant. Incidentally, not using the DMC for the purpose of PCM playback frees it up for a seldom used trick: modulating the volume of the 2A03’s triangle channel. This is a huge win because it allows the triangle to join its square brothers as a dynamic part of the NES’s musical ensemble.

Therefore, the only way to play Former Dawn properly on a toploader NES will be to mod the unit. All things considered, it’s a fairly simple and inexpensive mod, but it does require opening the chassis and soldering a resistor in between two pins. We know that this is a fairly common mod already because there are enthusiasts out there that like playing Famicom games on their toploaders via adapter cartridges; such people will be able to play Former Dawn just fine. For unmodded toploader owners who are both unwilling to mod their units and unwilling to buy frontloader NESes, it would be highly advisable to play the PC port of the game instead. We’d rather they do that than play the game with the sound muted, or even worse…listening to a confusing broken half of the soundtrack and no sound effects!

On a more positive note(no pun intended), the last question (Q7) is one of the most exciting ones. One of the things that really helps sell the SNES’s technical richness is its echo buffer. It was used for reverb in music and sound effects, notably in Chrono Trigger, A Link to the Past, Terranigma, Super Mario World, Super Metroid, and many others. We ended up implementing an 8-bit version of it that is a little more robust than the one in the SNES; in fact, we implemented 2 separate ones. One of them is dedicated to SFX and the other to music. They can be independently configured, and each of the 4 channels within each part of the music/SFX divide can choose to subscribe to the echo buffer or not. This will allow for the music to have a subtle reverb effect layered in while also having an echoing-off-the-walls effect for in-world SFX in e.g. caves or tunnels. This might be slight overkill, but it was relatively inexpensive for us to do. The bang for buck was quite high, and we think players will rather enjoy the added immersion that it allows.

Here are a few examples of what our final system, 2A03 + MXM-1, sounds like. All of this is working on real NES hardware:

“This Is Really Exciting”
“Titat Intro or Title idk”
“Vicroy Scott”
“First Place Will Be Mine”
“See It With Your Eyes”
“That’s A Funny Trick To Play On God”

All of the above 7 tracks were composed by hEYDON. In fact, all of the tracks in this article were composed by him except for “Inversion Battle”, “Synth2 2G Demo”, and “Kzer-Za Theme”. (Many thanks!)

TL;DR

MXM-1 now has full blown, finalized expansion audio. It sports the following features:

  • 8 channels of 8-bit mono PCM with a maximum playback rate of 44.1KHz (4 for SFX and 4 for music)
  • Sinc function interpolation which is butter smooth and allows re-pitching up and down several octaves
  • 2 configurable echo buffers (1 for SFX and 1 for music)
  • 11-bit delta-sigma DAC
  • Simple wavetable support for fine grained, composer-defined looping
  • Works perfectly on any unmodded Famicom, frontloader NES with expansion audio bridge installed, or expansion-modified toploader NES

To hear what it sounds like, scroll up a bit and start clicking Play to your heart’s content.

It’s been a long journey, my friends. It’s wonderful to have arrived at our final stage of evolution.

-Jared

Unlocking the NES (for Former Dawn)

Definition of unlock
transitive verb
3 : to free from restraints or restrictions
// the shock unlocked a flood of tears

Former Dawn aims to be the most extreme example yet of what could be called Neo Vintage — a new game for an old system. This is literally the opposite of the excellent forum site VOGONS (Very Old Games On New Systems). When forming Something Nerdy Studios in early 2019 and launching our first game project, we all felt as though creating an advanced modern RPG that targets the NES would be a really fun and cool thing to do, but that the available memory mappers from the system’s heyday seemed too limiting. We knew quite well that the easiest thing to do would be to give up and make a retro game on the PC instead, but that rubbed us the wrong way. Not only was that already a very crowded market by 2019, it wasn’t good enough merely to create an NES-like game that could never actually work on a real NES. We wanted to find out how far we could go on the real thing!

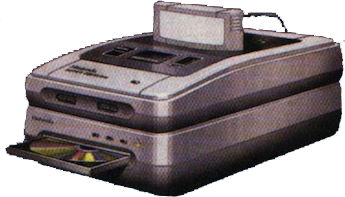
This is as close to the NES-CD as we got, and we didn’t even get this. Funny that it did give birth to one of the most successful game consoles of all time.

At first, it seemed like either MMC3 or MMC5 would be our best bet, despite the nagging feeling that something much better could be crafted if we just had the know-how and manufacturing connections. It seemed to us that there was vast untapped potential in the NES, and that providing it with gobs of ROM is the primary way to tap it. Although SNK pioneered very large ROM sizes in the early 90s via the Neo·Geo, both that system and the games for it were exceedingly expensive because of mask ROM prices at the time. What if there had been a more economical solution back then? Specifically, what if the NES had enjoyed CD-ROM games that would’ve continued its lifespan and taken a bite out of the TurboGrafx-CD, Sega CD, and 3DO? Try to imagine what modern PC gaming would be like if you only had 1 meg to play with; would anyone even take it seriously? Sure, a lot could still be done in 1 meg but it would be nowhere near enough space for the features that modern gamers expect in new games — even indie games. Similarly, there’s no good reason to think that the same is not true of the NES.

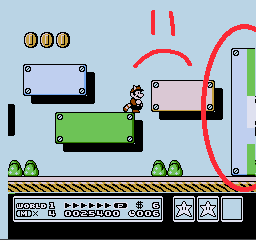
Yes, I saw this on CRTs back in the 1990s. Yes, it bothered me. Don’t pretend like this isn’t a problem. 😛

In addition to space requirements, there are many pieces of low hanging fruit that almost no classical NES games plucked. For instance, did you know that glitchless diagonal scrolling (using 4 “nametables”) was baked into the hardware design of the NES from the very beginning? Despite Super Mario Bros. 3 using the MMC3 memory mapper, Nintendo opted not to include the tiny amount of extra RAM on the cartridge necessary to unlock MMC3’s scrolling enhancement, which is why the obnoxious graphical glitches appear at the right side of the screen during gameplay. That sort of thing felt inexcusable to us, so to get our feet wet, we implemented glitchless and perfectly smooth 8-way scrolling in an MMC3 “walking simulator” game demo. As far as we know, this had only been accomplished on the NES (read: not Famicom) in 1 title — Tengen’s Gauntlet (which is technically a simpler predecessor to MMC3) . And even in that game there were only 4 screens per level, which is the easy way to do it. Our proof of concept sported a 16-screen level with lots of complex graphics, with the ability to add even more screens. This was a much harder feat, but more importantly, much more conducive to something like a sprawling RPG.

Just Breed is arguably the most advanced RPG on the Famicom/NES to date. It uses MMC5 and 8×8 attributes. Note the scrolling glitches at the top and right!

Thus emboldened but still lacking the ability to create our own mapper, we pushed forward with inventing as many new tricks as we possibly could — what were called “novelties” around the office. We ended up creating quite a few of these…so many that it really did seem like the ROM space constraints of MMC3 would’ve prevented us from fully exploiting them. MMC5 allowed for a little more space than MMC3 (about double), but lacked MMC3’s quad nametable feature. MMC5 also sported 8×8 attributes (I.e., denser coloration of the screen than the NES’s stock 16×16 attributes allow), but the feature is hardwired to only use a single nametable. Thus 8×8 is so broken in MMC5 that it doesn’t work correctly with hardware scrolling. This whole classical mapper situation was a mess, and in any case, no existing memory mapper for the NES allowed anywhere near enough space to facilitate expansive games full of advanced level design, rich soundtracks and sound effects, high frame rate sprite animations, intricate background animations, or SNES/PlayStation JRPG quantities of dialogue…let alone something as crazy as FMV.

It was at that time that we had the good fortune of meeting Paul Molloy from Infinite NES Lives. We told him of our ambitions and he in turn told us that he had designed a new type of FPGA-based NES cartridge that would probably serve our needs. At the time, he needed to work out some issues with it and partially redesign the PCB, but there was enough functionality there to tell us that we had our path forward. The main problem was, the hardware wasn’t enough; at least one of us had to learn Verilog in order to implement our mapper on that hardware. But in turn, before specifying the mapper in Verilog we had to know what to specify!

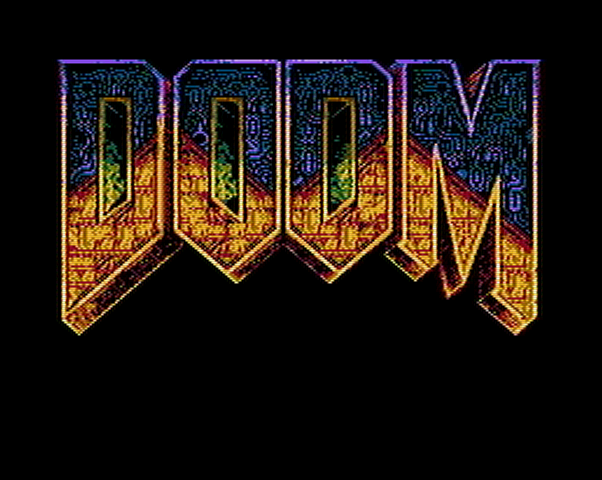
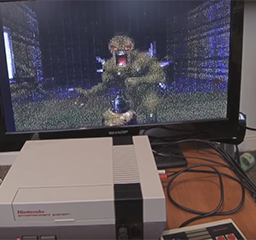
This logo demake for the NES by Ellen Larsson is the only legitimate part of Doom that can actually run on the NES.

Up until that point, I had cheekily called my fantasy mapper “The Gigamapper”, because it would, at a minimum, supply the NES’s CPU and PPU access to a gigabyte of ROM. (We also toyed with only giving it a gigabit of ROM, to be in line with NES and SNES ROM size nomenclature.) This base requirement now seemed almost trivial, and it was quickly apparent that we could do many, many things with a cartridge like this that had heretofore been impossible. But we definitely did not want to “cheat” in the way that Doom-on-the-Raspberry-Pi-on-the-NES does. Something undeniably anachronistic like that lay very far from our interests. In other words, the NES needed something new that could have been something old, but never was. What then, to do?

= Guiding Principles =

We decided that since 1994 marked the end of the NES’s original lifespan, we had to create an expansion system that would’ve been plausible in 1994 — technologically and economically. This is the base principle from which the rest of our mapper design philosophy flows. At the same time, we chose not to do absolutely everything that was possible in 1994. This is in part because we wanted to know what the NES was capable of “on its own” in the very specific sense that it still does all the computations that are ends unto themselves. Essentially, this means that something akin to a CD-ROM expansion is perfectly fine, but that a 3D accelerator or math co-processor is not.

In addition, video compression algorithms like MPEG were suspicious at best, and we’d prefer to avoid them. Although MPEG-2 was out by 1994, it was intended for display resolutions, palette freedoms, and color depths that are not possible on the NES. Because of this, in order to use it at all we’d have to implement additional conversion logic in hardware, which would probably violate the economics requirement mentioned above(even more than adding an MPEG decoder to the BOM would do already). It would probably also result in terrible image quality compared to whatever bespoke algorithms we came up with.

We interrogated these principles and after much debate around the office and with other people in the broader NES development community, we arrived at these conclusions. For ease of reading and contrast, they are split between dos and don’ts.

= Conclusions =

Technical jargon is pretty much unavoidable when discussing a topic like this, so here it is. Anyone who doesn’t care about these details is welcomed to skip below to where I will graphically demonstrate what these features unlock in NES game development.

Allowed:

  1. Direct access to as much data as could be stored on just over 1 CD-ROM. (768MiB)
  2. Indirect access to as much data as could be stored on 4 CD-ROMs. (2.8GiB)
  3. Direct access to up to 1 MiB of RAM.
  4. Interposing the PPU’s data fetches in order to alleviate onerous limitations:
    1. 256 unique tiles per screen -> 960 unique tiles per screen.
    2. 2 nametables -> 4 nametables.
    3. 16×16 attributes -> 8×8 and/or 8×1 attributes.
  5. Automatic bank switching that facilitates items 4.1 and 4.3.
  6. Nametable bankswitching, allowing high performance background animations composed with other mapper features.
  7. Attribute bankswitching that facilitates item 4.3.
  8. Multiple fine-grained CHR banks. (16 banks of 512 bytes apiece)
  9. Multiple medium-grained PRG banks. (4 banks of 8KiB apiece)
  10. Error correction or “de-glitching” features, merely to correct behavior that amounts to bugs in the NES’s hardware design.
  11. Scanline counter. (Better than MMC3’s, in that it works correctly with all other features of the mapper.)
  12. DPCM sample size expansion. (4081 bytes -> 16MiB)
  13. Audio synthesis chip [emulation] (YM2608, YM2610, YM2612, etc) for expansion audio purposes.
  14. Dual-port ROM and RAM.

Disallowed:

  1. Offloading general purpose calculations. (I.e., no CPU, FPU, or any other kind of co-processor on the cartridge.)
  2. Offloading graphical processing. (So nothing like Super FX, SA-1, etc.)
  3. PCM audio streaming via expansion audio.
  4. Exceeding the computational power or complexity of the NES itself.
  5. Exceeding the circuit complexity of MMC5, which was the most complicated classical memory mapper for the NES.
  6. Re-implementing the PPU for any reason whatsoever.
  7. Physical form factor any larger than a traditional Game Pak. (I.e., the game cartridge has to fit properly in a frontloader NES.)
  8. Transferring data from SD card into cartridge RAM at data rate that exceeds that of a quad speed CD-ROM drive. (600KiB/s)

Our memory mapper began life as C++ code inserted into our local fork of Mesen, and only implemented feature 1. All of the other features except for 2, 13 and 14 eventually became implemented together in a single package which we call the Memory eXpansion Module 0, or MXM-0. Taking MXM-0 and combining it with stubs for 2 and 13 is what we call MXM-1. You’ll notice that feature 14 is left out of both; that is because INL is supplying that feature on the cartridge for us. It is therefore not actually part of our mapper(s). Feature 13 is also merely stubbed, because we are creating three different types of cartridges for Former Dawn — one with a genuine Yamaha YM2610 ASIC inside, one with simulated YM2610 audio synthesis coinhabiting the FPGA that implements MXM-1, and one without expansion audio entirely.

MXM-0 and MXM-1 are both now implemented in Verilog as well, with almost all features fully usable and complete. Like all of the classical memory mappers for the NES, ours run beautifully on the EverDrive N8 Pro. Very soon we will adapt MXM-1 to our prototype cartridges from INL. In other words, this mapper is real. It is not a theoretical construct! Any one of you with a genuine hardware NES (frontloader or toploader) could insert one of our N8 Pro dev cartridges and run the current build of Former Dawn right now. Compatibility with NES clones varies, but is quite good; more on that later.

= Explanation (Allowed) =

In order to understand our motivations for implementing each of the Allowed features, each one needs to be described in some detail along with visual examples if possible. In such cases, the image on the left will be an NES game suffering classical restrictions, and the image on the right will be something that is made possible by MXM — preferably from Former Dawn.

1. Direct access to as much data as could be stored on just over 1 CD-ROM. (768MiB)

…we can do this on the NES.
So instead of this…

When we began implementing what became known as MXM-0, we thought that Former Dawn was going to be stored entirely in NOR flash on the new INL board. (Since mask ROM production incurs prohibitive fixed costs, this is what everyone else in the modern NES “homebrew” scene is doing.) Because of various uncertainties in chip supplies and technical difficulties, we opted to take INL’s offer to include an SD card on the cartridge as well. As it turns out, we think that the fast-access part of the game can quite comfortably be stored in 16MiB of (NOR flash) ROM. If we had known at the very beginning that we were going to go the SD card route, we might not have facilitated direct access to 768MiB of ROM in MXM-0. But we did, and now we see no reason to remove it — especially because anyone who uses MXM-0 in the future might want to create a Neo·Geo style cartridge for the NES with a massive amount of ROM in chip form instead of SD card form. Why not? In either case, the basic point is that having so much ROM means that one can now spend that ROM liberally in order to upgrade the quantity and the quality of pretty much any aspect of an NES game you can think of of.

2. Indirect access to as much data as could be stored on 4 CD-ROMs. (2.8GiB)

…we can do this on the NES, but won’t because of the Copyright Act of 1976.
And instead of this…

Because of the fact that we’re basing Former Dawn‘s cartridge specs and memory footprint off of a classical CD-ROM console or console add-on, it made sense to base our ROM limits on actual examples of CD-ROM games from the early 90s. Most CD-ROM games used only 1 disc, but a few of them used more, even early on. Night Trap, released in 1992 for the 3DO and Sega CD came on 2 discs. In late 1994, Slam City with Scottie Pippen was released for the Sega CD and contained 4 discs — and this may be the record by 1994. So we’re setting our max ROM size to 4 CD-ROMs, or 2.8GiB. Whether or not we will come anywhere close to that depends on how much FMV we end up including in the game. No other assets would push the ROM footprint past 1 disc’s worth. Even if the OST were 2 hours long and we stored it as raw 7-bit 33.1KHz mono PCM, we would only need 239MiB. Before MXM-0, ROM sizes and more primitive memory mappers meant FMV on the NES was never achieved with full frame rate at full screen.

3. Direct access to up to 1 MiB of RAM.

In order to justify the decision to include 1MiB of RAM in this expansion system, there are 3 relevant questions: A) Can this amount of RAM reasonably be used by a 6502-based CPU? B) Would it have been economical in late 1994 to do so? C) WHY?

A) Yes. The Apple //e supported up to 1MiB of RAM. All it takes is carefully managed bankswitching and/or serial loading.
B) Technically, we are using 1MiB of static RAM, which would not have been economical in 1994. But this is because it’s more economical for us to use SRAM than DRAM in 2021. Using dynamic RAM would imply having to have some sort of memory controller on the cartridge, which would cost significant money and engineering time, not to mention possibly exceeding our available electrical power. However, consider that the original PlayStation was released in late 1994 and it had over 3MiB of RAM onboard.
C) Why? Because we need it. Classical cartridge games on the NES often had 8KiB of RAM onboard, and some had up to 32KiB. The reason why they needed comparatively little RAM was that the entire game’s assets were stored in mask ROM that acted like RAM in terms of access speeds. This is something that can be hard to appreciate for anyone coming from the PC gaming world where RAM is crucial(no pun intended). When you move to a CD-ROM sort of access model, you need a large buffer to hold levels, graphics, etc. One of the many reasons that early CD-ROM based video game consoles failed is that they didn’t have enough RAM to serve as a buffer for the data coming in from the CD-ROM drive. This unnecessarily increased the frequency of load times, or “thrashing”, and made for a terrible gameplay experience. We are actually constraining ourselves pretty significantly to crowd everything we want to do into 1MiB of RAM. Consider the fact that the FDS had a 32KiB buffer for loads from the floppy disks despite each side only having 56KiB. That means that up to 29% of a game could be cached at any given time in RAM. Given that Former Dawn is likely to take up dozens of megabytes even without FMV involved, our corresponding proportion is more like 3%; I.e., we’re suffering with about a tenth of the buffer in an apples-to-apples comparison. There is a possibility that we can make our code efficient enough to squeeze everything down even more and work with 512KiB of RAM instead of the full 1,024KiB, in which case we will save some money on the BOM for the cartridges and feel slightly smugger.

4. Interposing the PPU’s data fetches.

Most of the classical memory mappers for the NES interpose the PPU in some way. Usually it was to provide more than the paltry 8KiB of CHR, but sometimes it was done to facilitate CHR-ROM and CHR-RAM on the same cartridge (MMC3), provide more than 256 tiles per frame (MMC5), auto-switch CHR in the middle of the frame (MMC2), among other reasons. We have taken all of these to their logical extremes; here are the details:

…and this is the whole shot featuring only 549 tiles. It’s not even using the full 960, but what a difference it makes!
This is how much of a scene from Terminator 3 that can be shown on the NES with only 256 tiles.

4.1. 256 unique tiles per screen -> 960 unique tiles per screen.
Because of the 8-bit nature of the CPU (and PPU), there are many artificial restrictions in the design of the NES. One of these is the fact that without mapper support, you cannot put more than 2^8 = 256 unique tiles onto a single frame, despite the fact that the frame itself requires 960 tiles to fully cover it. MMC5 lifted this restriction up to 960 tiles out of a maximum set of 16,384. MXM-0 lifts it further to 960 tiles out of a maximum of 65,536. When limited to 256 tiles per scene, a severe burden is placed on the artist to create the illusion that such a heavy restriction is not in place. This can be accomplished either by making the scene/image smaller or by reusing tiles all over the place. The typical result in the classical NES era was a very patterned or simplistic look instead of more intricate (“entropic”) art being shown.

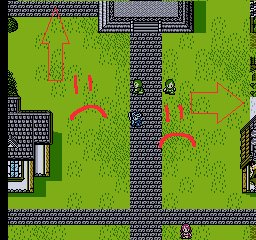
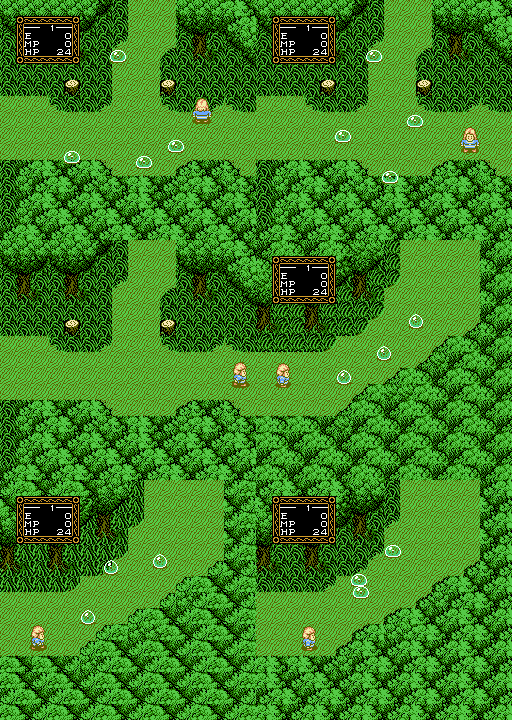
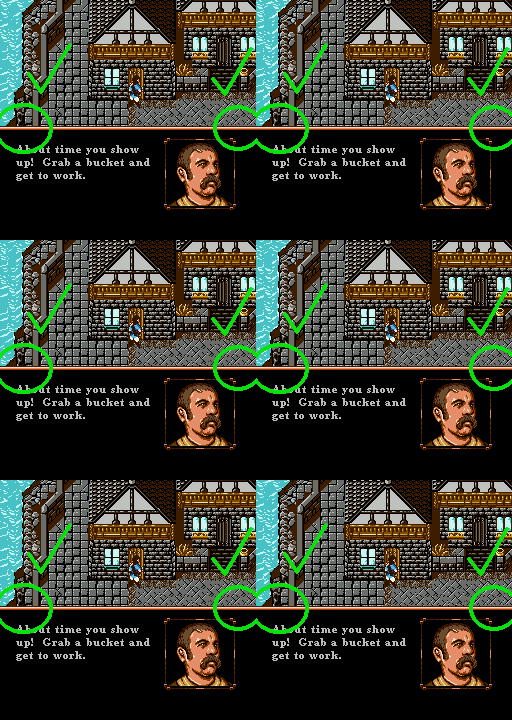
This is 8-way scrolling in Former Dawn on the NES. Note the total absence of graphical glitches at the borders.
This is 8-way scrolling in Crystalis on the NES. Note the terrible graphical glitches at the borders.

4.2. 2 nametables -> 4 nametables.
As mentioned in the preamble, we include support for 4 nametables primarily to facilitate smooth 8-way scrolling with no restrictions. In fact, we have support for more than 4 nametables, but only via bankswitching. At any given time, the PPU “sees” 4 nametables because that is how it was designed to work. One of the reasons that the developers of original era NES games accepted having such terrible glitches (resulting from only having 2 nametables) in their scrolling systems is that most retail CRT TVs of the day obscured the errors because of typical NTSC overscan. We don’t have that luxury because a lot of people use PVMs, upscalers, or emulators to play NES games in the modern era. We we are holding ourselves to the ultimate standard — the game must look perfect when viewing the entire 256×240 frame, at all times.

An interior view on Former Dawn exhibiting the 8×1 attributes of MXM-0. Note the sophisticated shapes and textures that can result from the palette freedom.
An interior view on StarTropics exhibiting the 16×16 attributes (palette choices) in classical NES games. Note the blocky appearance that almost always followed.

4.3. 16×16 attributes -> 8×8 and/or 8×1 attributes.
The stock NES hardware imposes an “attribute” grid across the frame where each 16px X 16px square (a “metatile”) has to subscribe to one 4-color palette of the 4 total background tile palettes that are in the PPU’s internal RAM at any given time. This is an extreme restriction that naturally resulted in almost every game for the Famicom/NES having a certain look because of how hard it is to “fight the grid”, to use a term that David Crane coined. MMC5 lifted this restriction so that the attribute grid is 4 times more granular: 8×8 squares instead. Unfortunately, MMC5’s 8×8 attribute mode is not truly compatible with hardware scrolling because it only works with 1 nametable at a time. Because we feel strongly that the hardware scrolling feature of the NES is the most important thing about its design, we went further than MMC5 did in this regard. We re-implemented an 8×8 attribute mode in MXM-0 that is fully compatible with hardware scrolling in all 8 directions, using 4 simultaneous nametables as just mentioned in 4.2. After that, we went even further and created an 8×1 attribute mode which is also fully compatible with quad nametables. This 8×1 attribute mode is key to Former Dawn‘s aesthetic, because it allows the PPU to draw as freely as possible given its intrinsic design constraints. There is no further enhancement that be done, in other words. It is literally impossible to get 1×1 attributes (I.e., fully bitmapped graphics) across the entire frame. In a local region of a frame, multiple sprite overlays can be used to achieve this. But that comes at the extremely high cost of blowing out the sprite system, which is something that is rarely worth it. Our 8×1 attribute mode can be used freely across the entire game, which means that artists on the project have much more freedom to use their pixel art skills to achieve intricate shading across a whole frame — something heretofore impossible on the NES. Strangely enough, this is still impossible on the SNES because of the fact that the (S-)PPU’s address and data pins are not directly exposed to the cartridge slot on that system. Therefore, as far as we know this 8×1 attribute mode in MXM-0 and MXM-1 is something wholly unique across the entire space of vintage gaming consoles which use tile-based background graphics.

5. Automatic bank switching that facilitates items 4.1 and 4.3.

In order to avoid annoying timing difficulties and restrictions, we also enhanced the CHR bankswitching to be automatic based on metadata that we sneak into CHR in between regions of tile data. This helps free up the CPU to conduct the important work that only it can do. You know, running the game logic instead of babysitting the PPU or memory mapper.

6. Nametable bankswitching.

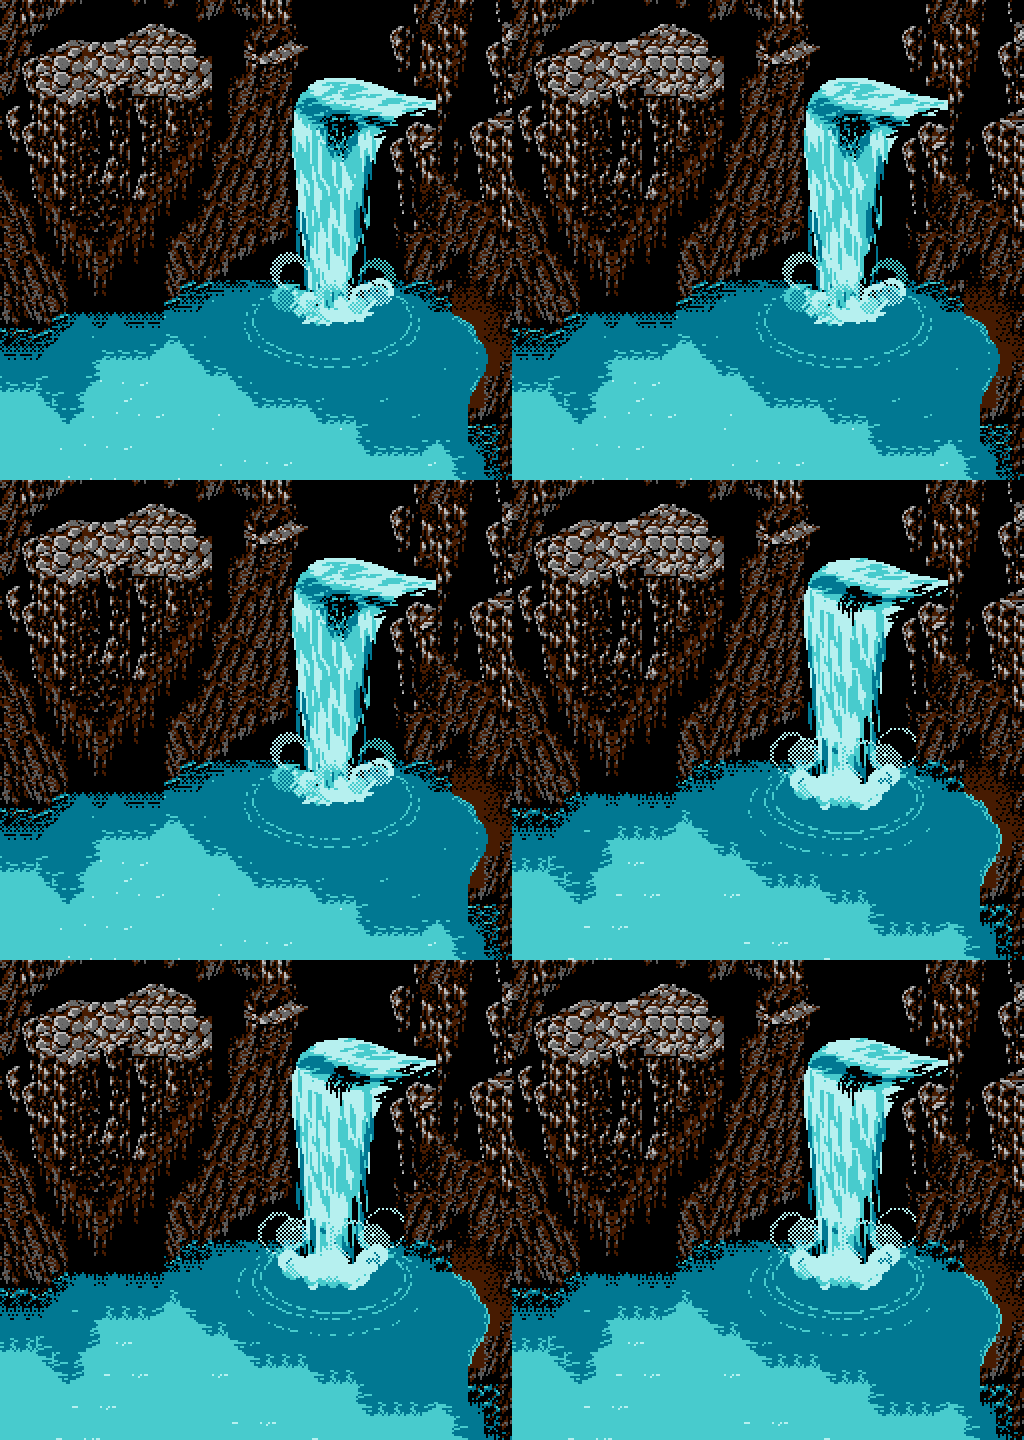
Subtlety is a virtue in game design. We have striven to achieve it, as these 5 different animated background object types integrated into one small area show.
Willow‘s use of animated background tiles was commendable for the time, but its execution missed the mark. It relies on pure CHR bank switching at a unified (and frantic) playback rate.

Going further along the lines of alleviating CPU from babysitting the PPU, we implemented nametable bankswitching in a highly usable way. Again, this is a feature that technically has been implemented in previous memory mappers (E.g. Sunsoft-4, which After Burner used), but those implementations were not fleshed out enough to be truly useful. Our nametable bankswitching is composable with automatic CHR bankswitching and 8×1 or 8×8 attributes. This allows intricately animated background tiles without forcing the CPU to traverse the nametable data and update regions of it to facilitate that animation. It also means that multiple tilesets can be used on the same screen simultaneously, and even animated at different frame rates! This subtlety is key to making Former Dawn‘s environments feel dynamic and alive without feeling overpowering (as it is in Willow) — something that even Chrono Trigger did not accomplish consistently. To be fair, the SNES is more than capable of accomplishing the same thing via other means, so it’s probably only lacking in Chrono Trigger because of ROM size constraints which we do not suffer.

7. Attribute bankswitching that facilitates item 4.3.

This is a straightforward requirement. I only mention it to point out that it was required in order to get other features to work.

8. Multiple fine-grained CHR banks. (16 banks of 512 bytes apiece)

Classical memory mappers had various granularities of CHR bankswitching, ranging from 8KiB (1 bank) down to 1KiB (8 banks). We took this further to 16 banks of 512 bytes apiece. This makes it possible to have 16 sprite-based entities on the screen simultaneously, all animating independently. (E.g., playable characters, NPCs, enemies, or background elements modeled with sprites.) In practice, we will rarely use more than 8 such entities because of the global per-frame sprite limit of 64. However, the freedom to eagerly load entities into independent small banks eases the programming effort enormously. For instance, projectiles and particle effects can be queued in advance of actually displaying them while current assets are being rendered. We can also mix and match different enemies and NPCs across the entire world of Astraea without duplicating graphics in ROM, and without coupling their animation frames to each other. This technical decoupling seemed very important for showing Astraea as the rich, varied world it’s supposed to be.

9. Multiple medium-grained PRG banks. (4 banks of 8KiB apiece)

Splitting PRG into 4 banks of 8KiB apiece seemed like the best approach to address the concerns of 6502 Assembly code organization and ease of management at runtime. Any smaller than 8KiB and related subroutines would often not be available simultaneously. Any bigger than 8KiB and awkward bank switching would have to be conducted much more often when disparate parts of the codebase call each other.

10. Error correction or “de-glitching” features.

We could just time mid-frame shenanigans better than programmers did in the 80s and 90s to get rid of these problems, but we decided to make it easier on ourselves with a tiny bit of extra hardware support.
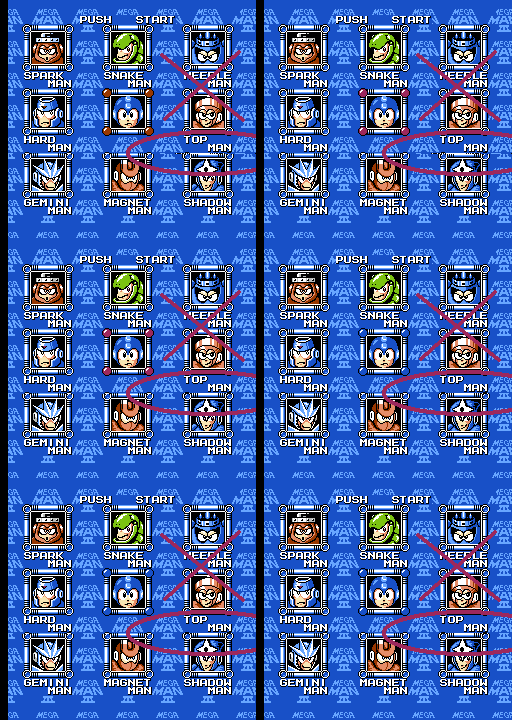
I always wondered what caused this on Mega Man 3 when I was a kid; now I know! The 6502 Assembly programmers simply lacked the software OR hardware support to make it easy to debug things like this.

Anyone who has played the classical NES game library extensively will surely have run across numerous examples of rendering glitches. Prominent examples include: flickering pixels at the border between the game field and the HUD in Super Mario Bros. 3, flickering pixels mid-frame in the level selection screen in Mega Man 3, and flickering pixels when accessing the Start menu in The Legend of Zelda. These glitches manifest in part because of difficulties that developers faced in the 80s and 90s with the limited development tools of that time. The timing has to be carefully tuned in order to avoid inducing erratic behavior in the PPU when making changes to its internal state mid-frame. But sometimes they’re extremely hard to get rid of even with modern tools like Mesen’s debugger. We implemented one mapper trick to help solve these timing difficulties, and another to help reduce similar glitchiness that results from hardware interrupts firing in the middle of a scanline.

11. Scanline counter.

Currently, we have a scanline counter implemented which is fully compatible with all mapper modes. This facilitates many raster tricks like faux parallax scrolling that would be either difficult or impossible without it. We may also implement a general purpose CPU cycle counter similar to the one in Sunsoft’s FME-7 memory mapper in order to create even more advanced raster tricks. It’s difficult to graphically show the advantage of our approach for scanline counting, but it amounts to being able to do more of it while sacrificing less CPU time, and to accomplish it with less programmer time and headache. These savings can then be spent on making a better game. As mentioned in the previous article, the true number of colors in the NES’s master palette is actually 425, not 54. But accessing those additional 371 colors is difficult to do because the naive way to do it is to tint the entire screen at once to get a different 54 colors for an entire frame instead of mixing and matching them across the larger color space. The less naive way is to use a scanline counter and switch the “emphasis bits” mid-frame in order to get some of those extra colors. We will definitely do this for specific special effects in Former Dawn. It should be noted that 425 colors puts the NES near the TurboGrafx-16 and Genesis in terms of color space size, but on those systems the colors are much more (but not totally) freely usable. What it comes down to is that the NES has much more graphical power available than people are aware of, but unlocking that power either requires enormous software engineering effort, or a small amount of hardware engineering effort. We’re opting to employ both. How much time we will have to invest in fully exploring the possibilities will depend on factors that are unknown at this time.

12. DPCM sample size expansion. (4081 bytes -> 16MiB)

The APU part of the NES’s 2A03 CPU is hard wired to have a maximum DPCM sample length of 4081 bytes, which at the maximum playback rate of 33,144Hz amounts to 1 second of sampled audio. This is one of the most restrictive aspects of the NES’s design, and a real tragedy. The tragedy wasn’t felt much in the original NES era because ROM sizes were so constrained that not much sampled audio could be justified. Thankfully, the memory address range allowed by the APU for DPCM samples makes it possible for a memory mapper to offer assistance in expanding the allowed sample sizes. We’ve done this, all the way up to 16MiB. This expansion will facilitate longer sound effects, a more DPCM-rich soundtrack, and audio tracks to accompany FMV without skipping or tricky mid-frame bankswitching. It will also allow us to implement multiple “virtual DPCM channels”, thereby further enriching the soundtrack and making it possible to play DPCM sound effects in the game at the same time as the soundtrack without either one cutting out the other. It will also make it possible to play multiple DPCM sound effects simultaneously. As far as we know, nothing like this has ever been done in an NES game before.

13. Audio synthesis chip [emulation].

This is a big one that really demands its own blog post, which will come at some point. But in brief, we’ve chosen to have expansion audio on the cartridge that will be made possible on the frontloader NES via the expansion port plug offered by INL. (It should also work natively on the Famicom, of course.) The more advanced expansion port module from Perkka should also enable our expansion audio. The chosen synth chip for this expansion audio is slated to be the Yamaha YM2610, which was the sound chip in the Neo·Geo. We already have FPGA-based emulation of the YM2610 working, but have not written the interface for it that will alleviate the 6502 CPU core from having to feed it. This was accomplished in the Neo·Geo via a dedicated onboard Z80 CPU, which we would like to avoid if at all possible. Several solutions have been proposed and we are working through the implications of them before making a decision. In any case, it is a hard requirement that the native 2A03 portion of the soundtrack sound fantastic on its own as well as combined with the YM2610 portion. Thus, anyone with any kind of NES or Famicom, modded or unmodded, will be able to enjoy the soundtrack to Former Dawn!

14. Dual-port ROM and RAM.

One of the biggest problems when dealing with any vintage video hardware (not just the NES) is managing the timing of reads and writes so that the VRAM is not being accessed simultaneously by the CPU and PPU(generally, GPU). In the specific case of the NES, the most useful portions of the PPU’s internal state cannot be written to at all while rendering is turned on. Thus, the safe solution has always been for the CPU to wait until either vblank or hblank to conduct writes into the PPU’s internal state. Since hblank is so short, almost nothing can be done there and what can be done is extremely difficult to time correctly. Vblank is comparatively longer, but is still quite short. The NES shipped with 2KiB of nametable/attribute RAM soldered onto the motherboard, which subjected it to these problems. But it was also designed so that external VRAM could be used instead — mapped within CHR-ROM or CHR-RAM. Thus, there is nothing that prevents such ROM or RAM from being “dual ported”; I.e., the CPU and PPU can both access it at the same time. All it requires is either special ROM or RAM and/or mapper support. Because INL was already developing a dual port NES cartridge in general, we chose to co-engineer this system with INL so that we can base much of Former Dawn’s programming on the assumption of dual-portedness. Strictly speaking, this is not part of MXM-0 or MXM-1, but it bears mentioning because it does require hardware support in a massive way. Basically, the distinction between PRG and CHR is eroded with such a system. Again, there is just barely a historical precedent for this: MMC5 contains 1KiB of “ExRAM” which is dual ported. We’ve just taken it much further and thoroughly depended on it for certain features of the game instead of treating it like a gimmick as it was in MMC5. We can do things like bank switch a RAM-based nametable into the PPU’s address space (I.e., into CHR) while also bank switching it into the CPU’s address space. Thus configured, the CPU can modify the nametable during rendering, thereby making many more features possible like robust destructible environments, particle effects, other special effects like faux mode-7 from the SNES, and more. How far we take it won’t be known until deeper into the project, because such things have almost no precedent on the NES.

Explaining what’s not allowed in our mapper is almost as important as what is, since designing something like this in the 2020s puts one in constant danger of stepping over the line. Here are the explanations!

= Explanation (Disallowed) =

1. Offloading general purpose calculations.

As cool as this is (and it is), it is definitely not an NES game in the meaningful sense that most of us would care to use the term.

If you’re going to make a game for the NES, you have to question exactly what it means for it to be “on the NES”. What is any video game at its core? It’s a computer program that runs in real time, takes user input, and uses logic to combine the user input with graphics in order to send video output. So it seems straightforward to remain steadfast on the point that the game logic part of all this take place on the NES; I.e., on the NES’s CPU — the 2A03. If you’re using some kind of modern general purpose processor (e.g. an ARM CPU) on the cartridge that runs the logic instead, you’re completely “cheating” in the sense that it’s not truly an NES game. Why? Because it’s akin to strapping a jet engine to a 1910s biplane — it makes it something categorically different and impossible to achieve in the device’s original context. So no matter how interesting or challenging it would be to do the modifications necessary for Doom-on-the-NES, it’s ultimately uninteresting as an addition to the NES’s game library, since almost any game could be added to the NES’s game library that way. In other words, a definition that includes everything is about as useless as a definition that includes nothing. If instead you’re using a period-accurate and purpose-specific processor (e.g. an early FPU) to assist in calculations, it’s less obvious that it’s “cheating”. But we think it’s better to avoid the problem altogether and just eschew any assistance or replacement of the 6502 core of the 2A03 for game logic purposes or related calculations. In this sense, our design is purer than MMC5’s, since MMC5 contains a general purpose integer multiplier feature accessible from a game program, and therefore edges towards fulfilling a CPU’s responsibility. Even worse than that, the 6502 does not even have a multiplication feature! So MMC5 is capable of enhancing the CPU of the NES in a way that’s not just adding a bit more of what it can already do — it pushes the combined system towards something more advanced like the Motorola 6809 or the Intel 8086.

2. Offloading graphical processing.

As cool as this might be, it is not really an SNES game in the fairest sense, since the bulk of the graphical processing is being done on the cartridge, not in the console. It’s a computer within a computer.

Similarly, a big part of what makes an NES game an NES game is the fact that the PPU is rendering the video. Small adjustments or enhancements seem OK, especially because they are grandfathered by various classical memory mappers. But putting something “big” like the SA-1 or Super FX chip on an NES cartridge would turn it into a fundamentally different system. Obviously, the typical consumer doesn’t care at all about whether or not a graphics enhancement chip is present on the cartridge. The SNES/Super Famicom game library contained many popular titles that did exactly that — including some of the most lauded ones such as Star Fox, Yoshi’s Island, and Super Mario RPG. In fact, the Super FX chip began life at Argonaut Games as part of the Star Fox project. The initial proof-of-concept game was made for the NES, not the SNES — and it was in turn adapted from their precursor Amiga game called Starglider. It was right around this time that the Super Famicom semi-final prototype was available, and Nintendo Co. Ltd. provided one to Argonaut. Brand new hardware in hand, Argonaut then ported the game from the NES to the SNES. After preparing a demo, they met with Nintendo in person and told them that despite the SNES having good 2D hardware for the time, they needed a 3D accelerator chip to make the game truly shine; thus the Super FX project was launched. No other company came that close to creating a 3D accelerator for the NES because the SNES was in full force by the time that Argonaut demonstrated the economic viability of putting an accelerator chip on a game cartridge for any system. So this phenomenon never made it to any game in the original NES’s game library, and we don’t want to be the ones to introduce it. We want to remain defensibly period correct, and this is another type of enhancement that is hard to defend. (It is also against our personal tastes.)

3. PCM audio streaming via expansion audio.

The closest analog to streaming PCM audio into the mix via the expansion audio line would’ve been “Red Book audio” — CD audio. But that’s not possible to do while a non-audio data track is being accessed on a CD-ROM game. You might notice on a classical CD-ROM game for the PC that either the audio is cut down in quality and/or is short, or the video is. This is no accident! Given that we do not have a big enough buffer to hold full PCM quality audio for anything but a trivial length of time, using PCM streaming via expansion audio during gameplay is extremely suspect. Doing it during FMV is something else, and we have already accomplished that as our Bad Apple FMV demonstrates. In addition, our composer wants the game to have an authentic early 90s sound to it anyway, and the best way to guarantee that is to use a genuine audio synth chip or at least emulate one in the FPGA. Remaining strictly period correct is much easier to accomplish that way, and helps avoid temptation.

4. Exceeding the computational power or complexity of the NES itself.

This is almost guaranteed by 1. and 2., but it’s worth mentioning anyway. Strictly speaking, it is a weaker requirement but it captures some edge cases that might sneak by without holding firm on this.

5. Exceeding the circuit complexity of MMC5.

Whether it’s fair or not, the MMC5 is a somewhat controversial enhancement chip in the modern NES development community. It would’ve been extremely difficult (if not impossible) to manufacture economically in 1983 when the Famicom was first released, so it represents a clear improvement in the technology that was introduced late in the NES/Famicom’s lifetime. It is also the most advanced enhancement chip that ever made it into a commercially released NES or Famicom game. Therefore, we hold it as a good guidepost to how complex of a circuit MXM-0 can be. Because MXM-1 also contains SD card access logic, we exclude that part of it from the comparison. If MXM-1 had been released in its period correct CD-ROM add-on form, the part of it that would’ve handled the CD-ROM drive itself would likely have been on a separate ASIC or set of ASICs. This helps make the comparison to MMC5 cleaner. MXM-1 will also contain an interface to (but not the implementation of) either the YM2610 or an FPGA-simulated form of the YM2610. The circuit complexity of the YM2610 in either ASIC or FPGA-simulated form is also excluded from a comparison to MMC5. Thus in order to be fair, we exclude the expansion audio portion of MMC5 itself in such comparisons. Thus far, with all these caveats in place, MXM-1(and thus MXM-0) is slightly less complex than MMC5. (This is due largely to the fact that we have rejected inclusion of many features of MMC5 that we regard as gimmicky, inefficient, or unneeded for our game design; examples include vertical split screen scrolling, tile fill, and variable banking modes.) We reserve the right to end up at a place where MXM-0/MXM-1 is marginally more complex than MMC5, but will strive to be reasonable and keep it under control as we finalize the design.

6. Re-implementing the PPU for any reason whatsoever.

This is almost a recapitulation of 2., but it also seemed worth pointing out. It would be crass to do this, even if we could do it and still sneak past the other requirements.

7. Physical form factor any larger than a traditional Game Pak.

This is, to borrow a term, to avoid “the image of impropriety”. It shouldn’t be a problem for us anyway, because we really aren’t doing anything that crazy! It would also be violated in spirit if MXM-1 really manifested as an expansion port module that fit underneath the NES. In any case, we think it’s better to err on the side of caution on this front as it is on several others. We also know that our customers are expecting a cartridge that looks like bog standard Game Pak, at least on the outside. And that’s what we’re going to deliver.

8. Exceeding the loading speed of a 4X CD-ROM drive. (600KiB/s)

Something tells me you’ve probably never even heard of the Pippin. All that glitters is not gold.

The rationale for modeling our data transfers on a quad speed drive is that such drives were available on the retail computer parts market before the release of Wario’s Woods at the end of 1994. It stands to reason that such a drive could’ve been used in a CD-ROM console by the end of 1994 as well. However, there is only one known CD-ROM based video game console that features a 4X drive, which is the Apple Bandai Pippin. Not only that, but the Pippin was released in early 1996 which admittedly causes a weakness in our justification. Most of the successful CD-ROM based consoles in the 90s used a combination of 2X drives and video compression instead, probably to keep costs down on the drive components. (The only exception is the Dreamcast, which sported a 12X speed drive, but it didn’t come out until 1998.) So we are currently experimenting with lossless compression algorithms that could reasonably have been implemented on a relatively inexpensive 2X CD-ROM add-on to the NES in 1994 or earlier. One of them is LZW. Because LZW was patented from 1983 until 2003, it specifically would probably not have been used on an “NES CD” system in 1994 due to licensing costs. However, we are free to use it for Former Dawn since we are creating this game well after 2003. Also, the related but simpler LZ77 algorithm is currently under consideration because it seems to have enough compression power for us while being simpler to implement in Verilog. The compression ratio afforded by LZ77 might even be ample enough to model Former Dawn‘s data transfers on a 1X CD-ROM drive, which would put it in direct period-correct competition with the TurboGrafx-CD.

There are many other (somewhat novel) aspects to Former Dawn’s design than what we’ve facilitated directly in the mapper/expansion chip. But this article is really about unlocking the potential of the NES, which we feel is the responsibility of such a chip. Therefore, software-based tricks that we have invented or are borrowing from other developers will be covered in future posts.

= Frequently Asked Questions =

Q: Isn’t this just cheating?

A: Wow, do we get this question a lot. The answer is a solid no, in the sense that we are not “cheating” any more than The Legend of Zelda or Punch-Out!! are cheating. They used RAM on the cartridge (not just for saving); we use RAM on the cartridge. They did automatic mid-frame bankswitching; so are we. The list goes on, but the two most important things to realize are that everything we’re doing in the mapper per se was possible to accomplish economically in 1989, and that most of the classical NES games you know and love used essentially the same tricks, although in less refined forms and to less overall effect due to limited ROM sizes. The full response to this question deserves its own article, and I will probably write one at some point because this question gets posed more than any other one, and it is also the most controversial.

Q: Was all of this really possible when the NES was a current gen system?

A: Yes.

Q: Was all of this really economically feasible when the NES was a current gen system? Surely it would’ve been too expensive to engineer and deliver to the market at a price people would’ve paid.

A: Actually, we think everything we’ve done could’ve been done cheaply enough to be economically feasible if not compelling — certainly by 1994, but arguably even further back in time than that. People should keep in mind that the TurboGrafx-16 enjoyed its CD-ROM expansion in Japan by 1988 and it was commercially successful there. Why should the NES have been any different? Yes, it would’ve been more difficult to program the CD-ROM games for the NES, but far from impossible as we are continually proving as this project marches forward. The unfortunate reality is that Nintendo Co. Ltd. has had a tendency for a very long time to favor the least expensive option at any given time in history. After the burn caused by the split with Sony and the retail release of the PlayStation independent of any association with Nintendo, Nintendo opted for cartridge-only engineering for the Nintendo 64, which turned out to be very financially damaging. Even when they released a spinning media expansion for the N64 (called the 64DD), they chose to do it with (yet again) anemic data size disks by the standards of the day. Only 64MiB on a disk, while their competitors were putting out discs with 10 times that amount of data. In other words, Nintendo found themselves in the reversed position in the mid/late 90s when the competition was with Sega and Sony as they did in the early/mid 80s when the competition was with Atari and Coleco. One further point is that Nintendo chose to make memory expansion far more expensive in aggregate by including the memory mappers on every single NES cartridge instead of on a common expansion module that new games could all use. If someone owned 20 NES games, they paid for their memory mapper chips 20 separate times, with the costs buried in the prices of the individual games. Our proposed system would’ve been a 1-time expense, with the games themselves being cheaper. This is the same business model as the FDS, except with a far greater amount of storage. That greater amount of storage would’ve prevented the expansion from becoming obsolete, as the FDS did within a year or two of release as cartridge manufacturing prices kept falling.

Q: If this was possible back then, why didn’t Nintendo or some other company do it?

A: The obvious answer is that they already had the Super Famicom / SNES lined up for research and development by the time that this was economically feasible to do (1988-1989). Nintendo probably figured that if they were going to dive into the CD-ROM market, they may as well upgrade the underlying console at the same time. What we are exploring is an alternate timeline in which they kept the base system the same and “merely” expanded it the way that NEC and Sega did. Similarly, it’s akin to what happened with MS-DOS based PCs in the early 90s — the system architecture was left completely intact or at least backwards compatible, but with CD-ROM drives being added on. Those were often bundled with sound cards that interfaced directly to them and allowed a more enriched experience than the extra data alone provided. Ultimately, though, the justification for doing this rests on the technology and the economics, not the business acumen. It is very far from the truth that every decision that Nintendo made was the correct one. Plenty of gimmicky products were engineered and released to market that were far less worthy than what it is we’re trying to accomplish. I offer for your consideration this short list of examples: Virtual Boy, Famicom Disk System, Sufami Turbo, Datach, R.O.B., 64DD, and Power Glove. Insisting on only releasing cheap hardware does not guarantee that that hardware is a good value proposition. What makes it to market and what doesn’t is as much a function of executive caprice as it is intrinsic merit.

Q: Isn’t this just cheating, though?

A: No.

Q: Why don’t you just make Former Dawn for the SNES instead? Or the PC for that matter?

A: There are many reasons for this, but the primary one is that we feel quite a bit of love and respect for the NES and its role in video game history. We see it as a system that never saw its true potential. Frankly, it’s a shame that no one before us has chosen to do the relatively small amount of hardware engineering to “dance” with the CPU and PPU in just the right way.

Q: Doesn’t using an FPGA on the cartridge invalidate your claims to period correctness? FPGAs weren’t even invented yet by the time the NES was pulled off the store shelves. FPGAs are also incredibly powerful.

A: Well, this is true in a very trivial sense — the particular implementation that we’ve chosen to employ was indeed not possible in 1994. Then again, neither were large NOR flash chips that everyone uses for modern NES homebrew releases. Other people/companies use NOR flash for their modern NES cartridges for the same reason that we’re using an FPGA for our memory mapper: modern economics. Mask ROMs are prohibitively expensive in this modern context, and so are ASICs at the production levels we are likely to be at when Former Dawn releases. Nothing technical would prevent us from sending the plans for MXM-0 or MXM-1 to a manufacturer in China and having ASICs stamped out that would accomplish exactly the same thing on our cartridges that an FPGA does. But FPGAs allow us to do it more cheaply and to develop the technology more quickly. It is our level of discipline guided by our philosophy that prevents us from doing something with an FPGA that would’ve been impossible during the NES’s original commercial lifetime. Once we release Former Dawn and subsequently release MXM-0 (and probably MXM-1) to the public under an open source license, anyone will be able to verify this.

Q: Don’t the 8×1 attributes, massive ROM space, and other features of MXM-0/MXM-1 violate the “8-bit aesthetic”? What’s the point of making an NES game if you’re going to try to make it look like an SNES game or something even more advanced?

A: Right; so Battletoads shouldn’t have been created for the NES because it was more advanced looking than Super Mario Bros.? Solstice shouldn’t have been created because it was more advanced than Solomon’s Key? How about Kirby’s Adventure or Batman Return of the Joker? The truth is — on every video game console, the games made later on it look and play better than the earlier ones; it’s not just the NES. Also, as flattering as it is for people to compare what we’ve accomplished to the 16-bit era, we know that we will fail if that is the standard we are being held to. We are simply exploring what it means to maximize 8-bit video game technology, not turn 8-bit technology into 16-bit.

Q: FMV on the NES? Come on.

A: Please tell me with a straight face that kids playing the Jurassic Park NES game in 1993 wouldn’t have lost their minds if they’d seen an FMV cut scene of a T-Rex chasing down the Jeep in the jungle. Rejecting FMV as a candidate part of the NES aesthetic is born out of close mindedness. It is a failure of imagination and recollection of what that time was actually like. FMV is so common now that it’s pretty much expected in a AAA game release, or at least expected to be simulated with real-time rendering. But because it used to be so novel and hard to achieve technologically, almost everyone was excited about FMV in the 80s and 90s. So much so that unfortunately it turned into a gimmick for a lot of game development companies and poor quality FMV games became, for a time, a type of shovelware. What we are intending to do with FMV is comparatively tasteful and driven by a desire to enhance the storytelling medium of the NES, not replace good gameplay with thin wrappers around FMV. Think Another World, not MegaRace.

Q: Cheating!

A: No. Also, that isn’t a question.

-Jared

Mappers Matter

When Nintendo developed the Famicom in 1983, they chose a derivative of the MOS 6502, called the Ricoh 2A03, as the CPU for the system. This was a very reasonable and safe choice for multiple reasons.

1) The 6502 had been developed by MOS Technology specifically to be economical for low MSRP devices.

2) Six years earlier, the Atari 2600 had basically established the home video game market and was still dominant. The Atari 2600 also used a derivative of the 6502 for the CPU, called the 6507.

3) The simple instruction set for the 6502 made it fairly easy for programmers to write games in raw Assembly code.

4) Since the data bus for the 6502 uses 8 pins, it is called an 8-bit processor. However, there are 16 address pins, which means that the 6502 can directly address 65,536 bytes of information, or 64 KiB in modern tech parlance. This may not seem like a lot in 2021, but it was plenty in 1983.

(In the interests of legibility, the unit representing 1024 bytes — “kibibyte” or “KiB” — will be abbreviated as “K” for the remainder of this article.)

Pitfall! — the closest thing to an NES game on the Atari 2600, except for Pitfall 2.

The claim in reason 4) is the crux of the whole thing, and it deserves a little bit of a detailed explanation. Consider the fact that the two best-selling Atari 2600 games of all time (Pac-Man and Pitfall!) were both released in 1982, and both fit onto 4 K cartridges. Pac-Man sold 7,700,000 copies and Pitfall! sold 4,000,000 copies. For reasons slightly more technical than I wish to go into here, 4 K is the natural limit on the size of an Atari 2600 game, which was typically housed in a single chip inside the cartridge.

So, Nintendo concluded, 64 K should be plenty! After all, it was sixteen times more than what was needed for the top two games from their main competitor. In fact, they were so confident that it would be enough that they, like Atari, gave up a factor of 2 and accepted a 32 K limit on the game size for reasons explained down below. Unlike the single ROM chip inside an Atari 2600 cartridge, standard Famicom games took physical form in two chips: PRG-ROM and CHR-ROM; I.e., program memory and character memory. Program memory is where the code for the game resides, as well as level data, music data, etc. All of the graphics data on an early Famicom game was stored in character memory.

What’s inside an original 40 K NES cartridge (NROM).

Generously (or so they thought), Nintendo allocated 8 K for CHR-ROM, for a grand total of 40 K of ROM available on a standard Famicom game cartridge. The 8 K of CHR-ROM is further split into two 4 K chunks, corresponding to background graphics and sprite graphics. The Famicom also has 2 K of RAM on the motherboard that the CPU can use for game state. The remaining 30 K of CPU address space was either wasted (“mirrored”), available only with some sort of memory mapper/decoder, or spent on I/O port numbers for programs to interface with other components on the motherboard, such as the sound and graphics systems. Altogether, this 40 K of ROM was only ten times more than the maximum 4 K for a standard “large” Atari 2600 game, but ten times sounds pretty good, doesn’t it? Nice round figure that can be thrown around the board room, if not marketing materials. This standard Famicom cartridge configuration came to be known as NROM.

The problem was that Nintendo became too successful with the Famicom. As it turned out, the gods frowned upon Atari and smiled upon Nintendo, because Nintendo developed the Famicom right as the video game market was crashing in the USA. Atari started posting enormous quarterly losses, which put the company on the brink of destruction. After Nintendo re-skinned the Famicom and called it the Nintendo Entertainment System for release in the USA in 1985, it took off in popularity so fast, and so intensely, that it basically sealed Atari’s doom as a console maker.

The coup de grâce for the Atari 2600.

At this crucial juncture, Nintendo’s Super Mario Bros. came out and took the world by storm. There were some games released by 3rd party developers in this early period of the Famicom/NES, but none of them seem particularly notable compared to the games that Nintendo themselves developed. Other games developed in-house by Nintendo at this time included Duck Hunt, Excitebike, Ice Climber, and Gyromite. All of these games took up 40 K or less of ROM on the cartridge since NROM was the only cartridge type available at the time.

Due to the enormous initial success of both the Famicom and the NES, Nintendo had a difficult decision on their hands when looking to the future. Should they engineer and release a new console, one that would probably have to be incompatible with the old one whose games were selling so well? Should they sell an upgrade module to the original NES? Should they ride the wave of success as long as possible in the hopes they could create the NES’s successor before a competitor swooped in and did to them what they had done to Atari?

A Famicom sitting atop one of the weakest yet most charming floppy drives in existence: the Famicom Disk System.

As it turns out, they first tried the 2nd option. The upgrade was called the Famicom Disk System, and it was a bulky floppy drive that plugged into the Famicom’s cartridge slot via a special adapter cartridge and cable. The Mitsumi Quickdisk-based floppies for the FDS supplied 56 K per side, and were double-sided; thus FDS games could be up to 112 K in size. That’s almost triple the 40 K ROM size limitation of NROM, so this was a substantial improvement. However, the FDS only had a single drive head, so using both sides required ejecting the disk, flipping it over, and re-inserting it from time to time during the game. (This was common in the 1970s and 1980s with various spinning media.) A few FDS games were shipped on multiple disks, pushing the size (and tedium) even further. Even for the single-disk games, load times were definitely long and very annoying…an experience utterly foreign to those of us that grew up playing games on the NES instead of the Famicom.

It comes as a surprise to many Americans to learn that some of their favorite NES games actually debuted on the FDS. These include some of the most successful and iconic games that established franchises, such as The Legend of Zelda, Metroid, and Castlevania! In particular, the save game features of Zelda and Metroid started off identically, and both relied on writing to the floppy disks. When these games were later ported to the NES, Zelda’s save game feature was adapted to use battery-backed RAM, while Metroid was given the password system treatment instead.

Fortunately or unfortunately, the FDS was never released for the NES. This may have been in part because the cartridge adapter part of the FDS, having been designed for the toploading Famicom, was not a very good fit for the frontloader design of the NES. It was definitely due in part to the fact that mask ROMs became progressively cheaper throughout the 1980s. By 1987 or so, cartridges could be produced profitably that rivaled the 112 K maximum of the FDS disks.

And so, when Nintendo decided to port Zelda, Metroid, and other “large” FDS games to the NES, they had to face the fact that NROM simply wouldn’t do. So they resorted to a technique that was becoming popular in the 8-bit era — bank switching. Bank switching is a memory expansion technique that subdivides the address space of a processor into “banks”, which are mappable to equally sized regions of a larger memory device. The term “larger” here simply means that the ROM or RAM in question contains more data than the processor can natively address. By switching a given bank out for another during execution according to logic programmed into the game, it is possible for the processor to effectively have an expanded address space. Essentially, it’s like upgrading the CPU by adding on to it instead of replacing it outright. It is worth noting that bank switching, while not instantaneous, is very fast — usually measured in tens of CPU cycles. In the context of the NES’s 1.79 MHz CPU, this means a small fraction of a millisecond. Once the switch is complete, all of the data is available for random access. It is therefore quite different than the concept of (serial) “loading”, the way that the FDS operated. Also, note that thinking about loading data from an FDS floppy disk as a “bank switch” would mean that it takes about 1 second to switch out a single 8 K bank. This is about 300,000 times slower than “normal” bank switching on the Famicom/NES in the post-FDS era.

This is the chip that made it possible for Americans to experience The Legend of Zelda.

To facilitate this bank switching physically and make it easy for the game programmers to do it, special chips were created called memory mappers. Technically speaking, it is possible to map memory without resorting to bank switching (for example, by facilitating serial loading, or simply having a static mapping). But in the NES development/enthusiast community, the terms are used almost interchangeably in the sense that a memory mapper is assumed to exist primarily in order to allow rapid bank switching. The first two significant and successful memory mappers for the Famicom/NES were called MMC1 and UNROM. After that, it was off to the races; each new memory mapper that was created unlocked more and more potential of the system, ushering in the creation of better and better games.

To give a quick overview of the original Famicom/NES commercial era from the perspective relevant to this article, a reduced list of the memory mappers which were used for various games will be accompanied by a very subjective assessment of the five best (or at least notable) games that used each mapper. The true and full history of this subject is somewhat complex, and probably only interesting to the truly nerdy among us. For instance, technically speaking, the first memory mappers were not single chips…and the first one came out just barely before the FDS. Many memory mappers also provide other enhancements that can improve the graphics and sound in a more direct fashion than simply granting access to more ROM space. However, such features are outside the scope of this post. A simplified narrative captures the essence of the history of gaming on Famicom/NES far better, so no further apology will be given.

NROM (r. 1983) – Maximum of 40 K of ROM — Duck Hunt (24 K), Ice Climber (24 K), Excitebike (24 K), Galaga (40 K), and Super Mario Bros. (40 K)

CNROM (r. 1986) – Maximum of 64 K of ROM — Tengen’s Tetris (48 K), Solomon’s Key (64 K), Mickey Mousecapade (64 K), Mighty Bomb Jack (64 K), and Spy Hunter (64 K)

UNROM (r. 1986) – Maximum of 256 K of ROM — Castlevania (128 K), Rygar (128 K), Metal Gear (128 K), The Guardian Legend (128 K), and Paperboy 2 (256 K)

AOROM (r. 1987) – Maximum of 256 K of ROM — Marble Madness (128 K), Solstice (128 K), R.C. Pro-Am II (256 K), Wizards & Warriors II (256 K), and Battletoads (256 K)

MMC1 (r. 1987) – Maximum of 512 K of ROM — The Legend of Zelda (128 K), Metroid (128 K), Overlord (256 K), Final Fantasy (256 K), and Dragon Warrior III (512 K)

MMC3 (r. 1988) – Maximum of 768 K of ROM – Super Mario Bros. 3 (384 K), Mega Man 3 (384 K), Déjà Vu (384 K), Startropics* (512 K), and Kirby’s Adventure (768 K)

MMC5 (r. 1989) – Maximum of 2048 K of ROM – Castlevania III (384 K), Romance of the Three Kingdoms II (512 K), Uncharted Waters (640 K), Just Breed (768 K), and Metal Slader Glory (1024 K)

* Startropics is technically an MMC6 game, but MMC6 is exactly the same as MMC3 with an additional 1 K of save RAM on the cartridge.

One screenshot apiece for each game that represents the mapper made to use it, all the way from NROM to MMC5.
From left to right: SMB1, Solomon’s Key, Castlevania, Battletoads, Overlord, Kirby’s Adventure, and Metal Slader Glory.
(Click once, then right-click and click “View Image” to zoom in and see the detail.)

There were many more memory mappers than this used back in the 80s and early 90s, but I have excluded most of them because these were the “main” ones both in the sense that Nintendo themselves made them and in the sense that most of the games released for the system used one of these 7 mappers. (According to one calculation, about 89%.)

A few key observations can be made immediately, simply by looking at the above list:

  • As time progressed, new memory mappers were released which provided access to more and more ROM space.
  • The games improved dramatically (at least graphically) as that was occurring.
  • Mappers always “led” the games; most new games that used a specific mapper did not fully exploit it.
  • The engineering of official Nintendo memory mappers for the Famicom/NES halted in 1989, establishing the fun fact that every official Nintendo mapper was created in the 80s.

As I’ve said, the full story is complex. Extra ROM space does not necessarily make a game better, because it depends on how it’s used. The game creators can choose to use that extra space simply to give the game more levels, for instance. Or they could choose to spend it on more sophisticated music. Or, as I’ve implied in the 7-panel image above, they could spend it on more “entropic” (detailed) graphics. Usually, it was a combination of all these things…but not always. The path from the base of the NES mountain to its summit was winding, rocky, and treacherous.

It would be nigh impossible to prove with mathematical rigor, but it is self-evident that a game like Castlevania III is practically out of reach on an NROM cartridge. You simply could not squeeze a sophisticated (and already compressed) game that takes up 384 K into a 40 K space, let alone 512 K, 768 K, or 1024 K. But similar statements hold for most of the games at the 128 K level as well. Because of this practical (if not mathematical) impossibility, most of the games in the NES library released after 1987 would not exist if not for the memory mappers that were used to create them. That set includes the vast majority of the ones you’re likely to remember with fondness. The logic is inescapable — memory mappers define the experience of the NES as much as the base system does!

In other words, size matters.

Mappers matter.

Early Super Famicom prototype.

If we exclude NES homebrew, that’s where the memory mapper story ends, because of the advent of the Super NES. The Super Famicom was announced in Japan with images of a prototype in late 1988, with full commercial release occurring in Japan in late 1990. Its re-skinned American counterpart called the Super NES was released in late 1991. It is beyond debate that the SNES was vastly more powerful than the NES in just about every way. Despite this, the NES kept selling consoles and games all the way into 1994 in the USA — and past that point in other parts of the world. But Nintendo released no new mappers for the Famicom/NES in the last 5 years of the system, because they wanted to focus attention on the SNES. On the SNES, the role of memory mappers was greatly diminished because of the nature of its CPU. Nintendo again commissioned Ricoh to create a CPU for them: the 5A22. This next-gen chip was based on the 65C816 — a 16-bit processor that was in turn based on the 6502, and backwards compatible with it. The 5A22 has 24 address pins, thus enabling direct access to hundreds of times more memory than the 2A03.

The way the system ended looking in the USA.

So out of the gate, the first games on the SNES rivaled the largest NES games in size — and without the help of fancy memory mappers. The very first SNES game, Super Mario World, was 512 K. Again, this doesn’t seem like much these days but it was as large or larger than 95% of the games ever released on the Famicom/NES, and half the size of the largest one — Metal Slader Glory (1024 K). (As of the time of writing, there is an ongoing unofficial project to translate Metal Slader Glory into English and the resultant ROM size is about 1500 K, making it the largest NES game from the original commercial era by a factor of 2.) However, SNES games quickly rose in size and quality, resulting in juggernaut titles like Final Fantasy III and Chrono Trigger by 1994-1995. Those two games, in particular, were 3072 K and 4096 K respectively. The largest game for the system was Star Ocean, and it used hardware-assisted data compression to pack a 12288 K game into a “mere” 6144 K. It qualifies as the largest game for the SNES (technically, the Super Famicom) whether you consider its compressed or uncompressed form.

An awkward chimera — one foot in the 8-bit world, and the other in the 16-bit world.

But what might have happened if the NES had been given comparable ROM sizes…or even bigger? Well, we can get a hint about that alternate timeline by looking at a little something called the TurboGrafx-16. Called the “PC Engine” outside the USA, it was released by NEC in 1987 in Japan, and 1989 in the North American market. (Thus, it directly competed with the Famicom/NES.) This video game console, despite bearing the lauded “16” number in its name, also had an 8-bit CPU based on the 6502 called the Hudson Soft HuC6280. To be fair, the “16” part of the name refers to the graphics subsystem, which was reasonably classified as 16-bit. Its CPU also enjoyed 4¼ times the clock speed of the NES’s — a healthy 7.6 MHz.

At a glance, it isn’t so obvious that the TurboGrafx-16’s graphics system is all that superior to the NES’s. The two systems have almost exactly the same resolution, and comparable color counts. More on that comparison in the next article…

The first CD-ROM drive on a home game console.
Hey, at least it was less awkward than the FDS!

However, for this article, one fact is relevant: the TurboGrafx-16 enjoyed a CD-ROM drive. In fact, it was the first video game console to have one. Initially called the CD-ROM² in expansion form, it was later integrated into the system and released as the TurboGrafx-CD. It debuted in late 1988, and made it possible to bring games to market that were hundreds if not thousands of times larger than typical cartridge games of the time. The result was the release of many games for the system with stunning graphics quality and full motion video cutscenes. Unfortunately, the TurboGrafx-16 was essentially a flop in the USA, selling under a million units for the base system, and about half a million units for the CD-ROM expansion. By comparison, the NES sold over 33 million units in the USA alone, and 62 million units worldwide. So if the base TurboGrafx-16 system was so superior to the NES, and unquestioningly superior with the CD-ROM drive added on, why didn’t it stomp the NES into the ground? After all, the increased ROM sizes for NES games made possible by better and better memory mappers did result in better and better games!

In my opinion, there are three reasons: 1) Marketing difficulties. 2) Game library quality issues. 3) Price.

The TurboGrafx-16 is just one example of a general phenomenon in video game, and indeed computing, history: better hardware does not necessarily sell better. The devil is in the details — especially marketing.

So again, returning to the question in a slightly different way: Given that the NES was able to defeat the TurboGrafx-16 with one hand tied behind its back, what would’ve happened if that other hand had been untied? I.e., what would’ve happened if the NES had had a CD-ROM drive expansion?

That is the question that Something Nerdy Studios intends to answer, and answer in the best way possible: with a brand new game for the NES that is the size of a CD-ROM.

In the next article, I will outline the company philosophy that led to the new MXM-0 memory mapper, and the first game that is being created for it:

Chronicles of Astraea: Former Dawn!

Coming “soon” to an NES near you!

-Jared
Something Nerdy This Way Comes

Greetings, dear humans. Where do I even begin? How about at the beginning…

It all started around Christmas of 1987, when my mother purchased our first Nintendo Entertainment System for my older brother and me to share. He and I had been begging for it for a while, ever since we saw Super Mario Bros. on display at a kiosk in our local Wal*Mart. We already had an Atari 2600, and all 4 members of my family had been playing it extensively for years. Some of my earliest memories are of my father playing (without resetting) Dig Dug or Pac-Man for hours on end. Many of the games for the 2600 had held my attention long enough to get quite good at — in fact, I beat the infamous E.T. game for the 2600 around that time. But I could tell that the NES was going to be what I would later call a quantum leap in video game experience. It was impressive how many rich and varied games were already available for the NES by late 1987; especially The Legend of Zelda. I had been fascinated by the game Adventure for the Atari 2600, and could probably tell that Zelda was a glorious extension of the same ideas. That game’s packaging made what already seemed like a treasure literally look like one.

Treasure, I tell you!

But Zelda was too expensive for my parents to afford on top of the base console cost, so instead, my brother and I started off with 2 games — Super Mario Bros., of course, and Capcom’s original Commando. Commando was buggy as Hell and poorly designed, but I loved it anyway. I think I beat it fairly quickly, and was hungry for more games. I can’t remember which one came next, but it was probably Metroid or Kid Icarus. At some point, my brother and I began renting NES games from our local video tape rental store to supplement the games we actually owned. It was always a challenge to try to beat a game over the weekend, while we were away from school and could focus on it together.

While this was going on, I was also experimenting on a quite different system — my TRS-80 Color Computer Model II. Despite being only ~6 years old, I had been programming in BASIC and Logo for it for about a year. I was already keenly interested in programming my own video games, and had been doing things like loading a game from cassette tape, and then changing small sections of the source code before running the game to try to understand how it worked based on what broke or changed in the game. I suppose you could call it my earliest attempts at “ROM” hacking. Eventually, I began taking advantage of the fact that my mother was a book worm and frequented our local public library quite often. I would go to the Dewey Decimal System 00X area of the library, and grab as many books on computer programming as I could — especially those focused on game design. Soon I began writing my own video games from scratch based on those game design principles, complete with the best graphics and sound I could muster, which were understandably quite poor.

My first worker, the TRS-80 CoCo II. It obeyed all my commands…very literally.

This was a very fulfilling activity, and it came to define a large part of my childhood. But it bothered me that I couldn’t create games that were anywhere near as good as the ones I had on my NES. A few years later, my parents purchased my first PC — an IBM XT Turbo Clone @ 10MHz with a CGA graphics card, monochrome green CRT monitor, and a single 720KiB 3.5″ floppy drive; there was no hard drive. I began programming for that system in earnest, learning GW-BASIC and MS-DOS simultaneously while my game design improved dramatically. However, I still couldn’t make games that were comparable to even the worst NES games. I began to suspect that there was something fundamentally different about the NES and “normal” computers, but I couldn’t tell what it was.
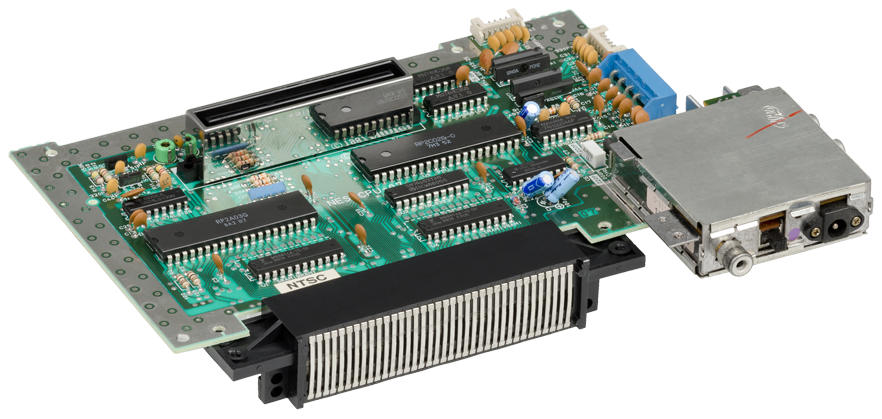
Was it the fact that NES games were always on cartridges? Was it because the graphics card in the PC wasn’t as good? Perhaps there wasn’t enough RAM in the PC?

That’s me on the right, pretending to understand web development in 1995.

Years went by, along with whole series of video games I programmed for my own enjoyment and to impress my family and friends. At the same time, my esteem for the NES and its library only increased, as I played and beat Mega Man 2/3, Rygar, Bionic Commando, Metal Gear… and before I knew it, I was a teenager getting involved in the earliest days of the NES(and SNES) emulation scene that revolved around the EFnet IRC network. I was too intimidated at the time to learn 6502 Assembly, so I contributed in the one way I knew how — graphics design. My friend Chris Hickman and I founded the Archaic Ruins website, with him primarily responsible for the HTML and me primarily responsible for the site’s graphics. I also made logos for Zophar’s Domain, snes9x, and ZSNES, among other projects.

Around this time, I started to learn some of the finer details of the NES’s hardware design, and finally began to understand what made the NES so special and capable of playing such wonderful games, despite ostensibly having very limited computing power.

The guts of the curiously capable little beast.

In a nutshell, it is because the NES, unlike “normal” computers, has all the components chained together in a continuous, tightly timed pipeline that puts the graphics to the screen in a very coordinated fashion. It has only 2KiB of RAM on the actual motherboard, which turns out to be plenty, because the cartridges supply the graphics and code directly to the system whenever the system calls upon the data — it doesn’t need to be stored in RAM in the first place, unlike on a PC. The graphics chip (the “Picture Processing Unit”, or PPU) is designed to operate not on a framebuffer like the PC, but on grids of tiles called “nametables” — an arrangement that simultaneously allows a type of primitive data compression, while also letting the very slow 6502 CPU conduct just enough updates every frame so that more graphics are always available as the camera moves across a level. I had assumed that the reason the NES had such great games, given such limited hardware as was available in the 1980s, was because of the ingenious Assembly programmers in Japan that carefully stitched everything together. And that made it all the more intimidating to learn Assembly, so I never really tried…despite learning 10 other programming languages throughout the 1990s, 2000s, and 2010s.

It would be another ~20 years before I finally had the courage to learn Assembly (first x86, and then 6502), and begin to entertain the possibility of finally creating my own NES game. During those intervening 20 years, I pursued a PhD in Mathematics, studied Computer Science in my spare time (with the help of Dominic Muller, whom I will get to in a minute), and became a successful Software Engineer in industry. At the end of that journey, I found myself to be in possession of enough skills to start my own video game company, and enough money to get it off the ground.

Does Nearly Anything

Now, I had been churning on an idea in the back of my head for a Science Fiction story since around 2011, but I hadn’t come up with it with the intention of turning it into an NES game. It took place in the far future, and involved a genetically engineered sentient species, destruction of knowledge of its own origin, a brave young member of that species discovering that there was something wrong with his world, exploring caves and unlocking secrets of the ancient past… but it was just a story. In fact, a complicated enough one that it seemed like the modern gaming PC would be a much better platform than the NES, if it could even be turned into a video game at all.

But when Dominic(Nick), who by this time was my best friend, showed me his first program running on the NES (in an emulator, technically), I got extremely excited. I suddenly knew that not only did I have the skill level to develop commercial quality games, but that I had a willing partner who could complement my skill set, and make it possible to create something special for the NES, the system from which I had drawn so much joy over the course of my life.

So, I decided to form a company with Nick, and pursue the development of an original NES game as our first project. But as I explained to Nick very early on, the ideas I had in mind for this game were just too elaborate to be contained within the kinds of ROM sizes that NES games traditionally had. Why is that? Well, there is a somewhat complex history to that, which I will go over in my next post. =)

-Jared